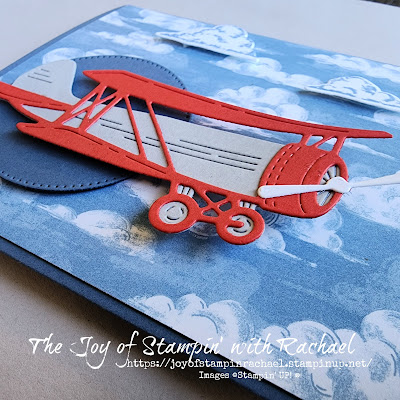
Fun Fold Friday with the NEW Adventurous Sky Bundle!
I knew the moment I saw this bundle at Onstage in Houston, I was going to get it for so many reasons!
My student I work with everyday loves airplanes, I lived in Dayton, Ohio, which is well know for the Wright Brothers and their airplanes, and my husband was in the Air Force for many years until he switched to the Space Force. Needless to say, I love this stamp set! The details on the dies are outstanding!
I was able to watch a quick video from another Rachael, but from Australia, and put my own "American" spin on this Fun Fold!
I love how simple this slider card is, and you can make it with any Stampin' UP! Stamp Sets or Designer Series Paper. If you want to make one just like mine, please watch my video (at the bottom), shop from my online store, and follow my step by step tutorial!
Supplies
Measurements
Misty Moonlight: 5 1/2" x 11", scored @ 4" and 8 1/4", 2 1/2" x 2 1/2"
Basic White: 4" x 5 1/4", 2" x 3" (die cut),
2- 3/4" x 2" scored @ 1"
DSP: 4" x 5 1/4"
Smoky Slate: 3" x 2"
Poppy Parade: 3" x 2"
Steps
- Measure, score, and cut your paper.
- Stamp two Boho Blue clouds onto the Basic White and die cut them out.
- Stamp the 4" x 5 1/4" Basic White with the Misty Moonlight ink only on the bottom right and to the far right top for greeting and plane.
- Die cut your plane parts (Smoky Slate, Poppy Parade, Basic White) and the Stylish Shapes Circle (Misty Moonlight). Glue the plane together.
- Mark the center of the Misty Moonlight between the two score lines (2 1/8). Use Heartfelt Hexagon to create a notch. Glue the DSP and flip over to line up the first notch to make a notch on the DSP.
- Use your paper trimmer to cut through the DSP & cardstock about 1 inch from the left and about 3 inches long (just estimate, no true measuring needed).
- Put both Basic White tabs through the slit on the far left side. Glue the circle to the tabs. Flip and glue the Basic White to the tabs (use Tear Tape).
- Attach the die cut airplane with dimensionals to the circle (only). Attach stamped clouds with dimensionals too.
- Glue the back of the card to create a "pocket".
- Gently slide the Basic White out to reveal the stamped imaged.
Video
Happy Stampin' Everyone!!!


Just to let you know the measurement for the plane die cuts are wrong it shoul be 4 by 2.....love this card...making it for a swap and yes I had precut all my papers and then I figured out the mistake.....UGH
ReplyDelete