t> The Joy of Stampin' with Rachael: May 2024

Friday, May 31, 2024

Fun Fold Friday- Cap & Gown Diploma Card


Graduation season is here! There is nothing more that Seniors want right now is for school to be over and to get their diploma! My daughters graduation is next week and I'm excited to give her this card!


The idea of this Fun Fold was to make the card it self look like a diploma by having a "tunnel" created with the paper and a paper ribbon. 


I heat embossed the gown and used Stampin' Dimensionals to attach to the corner of the card. 


If this card is made right (see video), you can fold it down and send in an envelope. Give this Fun Fold a try and order the supplies from my online store! 
Be sure to use the Hostess Code for May, JSW7TEWU, to get some extra Happy Mail from me! 


Supplies


Measurements
Thick Basic White: 5 1/2" x 10 1/8" scored @ 4 1/4", 5 3/4", 7 1/4", & 8 3/4"
Basic White: 3" x 2"
Poppy Parade: 6" x 1/2" 

Steps
  1. Measure, score, and cut your paper. 
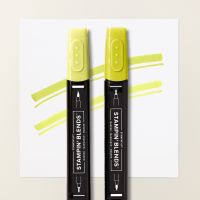
  2. Stamp in Memento Black onto the right corner of the cardbase the text and the diploma. Color the ribbon on the diploma with Stampin' Blends. 
  3. Heat emboss the gown onto the Basic White using Versamark, Black Embossing Powder, and the Heat Tool. Fussy cut the gown out and attach to the bottom left side of the cardbase. 
  4. Use a bone folder to crease each score line. Use Tear Tape or Stampin' Seal+ to create the tunnel/diploma. Watch video to learn how to attach so it can be folded down and fit into an envelope (give yourself 1/16th of an inch from the 4 1/4" score line).
  5. Make a banner end on one side of Poppy Parade and put Tear Tape on the back. 
  6. Measure the half way point (and mark with a pencil). Attach the Poppy Parade by wrapping around the tunnel and pinching the paper at the angles to create natural bends. 

Video

 
Happy Stampin' Everyone!!!

Wednesday, May 29, 2024

June's Card Class Club- Sweet Peas


June's Card Club Class is NOW open to register!

 This club you can join at any time and pick and choose what classes to attend. There are club perks (see below) but no penalties! 

This club is being co-created by Lynda Day, one of my most talented Stampin' Friends! We will take turns designing each month. If you attend her class, you will be getting the exact some thing, just a different video. 

Below are some answers to some frequently asked questions. 

How Card Class Club Works?

Each month starting on the 1st I will open up registration for the next class. You have until the 10th to register and send payment. To sign up you use the monthly link: https://forms.gle/khTiqYN6kJgZhctp8

After the 10th I order all of the supplies, make the kits, and send out by the 25th of the month. You will get a pdf with the Tutorial (which you will be asked not to share) and a video showing how to make the cards (that you can share). 

There will be a Facebook Group option if you want to join to share your card creations and to see others. 

What Comes in the Kit?

In the kit you will get the paper product supplies to make 8 cards in 4 different designs.

Kit Includes

- 8 cardbases & envelopes

- died cut shapes

-$20+ worth of Stampin' UP! products (embellishments, tools, ribbons, DSP, etc.)

Not in the Kit

-Inks

-Stamp Sets (unless you order it part of your class)

-Adhesives

-Scissors

-Clear Blocks

Not in the kit items can all be ordered from my online store when you click HERE

Club Perks

As a club member (you join my card club just by attending your first class) there are some extra perks! 

When you sign up for your 6th class (doesn't have to be in a row), you earned the stamp set from that class for FREE. 

Example: You attend 1. January 2. February 3. March 4. April 5. May 6. June 

Your JUNE kit would come with the stamp set used for the kit for FREE that month. 

There are BONUS Perks for Royal Hearts Stampers Team Members. Let me know if you want more details about that when you sign up for the class. 

Sneak Peek of Cards


Click HERE to join today! 
CLOSED


Video Coming Soon 

Happy Stampin' Everyone!!!

Tuesday, May 28, 2024

Demo Swaps- In Color Cards


My Demo swapping friends did it again! Made amazing cards! 
May's theme was In Colors either the new or the old! Below each card is the name and the stamper and the link to the stamp set they used. 

New 2024-2026 In Colors 

Cindy Hafner
Country Birdhouse (hello friend)

Natalie Woll


Marjeen Nation 

My Card Swap


2023-2025 In Colors 

Cheryl Holden 

Want to be a Demonstrator and get FREE New In Color products? 
Join my team before June 1st and this deal is YOURS!
Click HERE to join! 

Happy Stampin' Everyone!!!


Monday, May 27, 2024

Miss Monday- Sketched Butterflies


Miss Monday this Memorial Day with the Sketched Butterflies creation by the Stamp & Share Crew design team!!!


Nothing says spring like butterflies! Enjoy this simple, yet stunning design!


Petunia Pop Sketched Butterflies

All images © 1990-2024 Stampin’ Up!®


Supplies:

·       Stamp Sets:  Sketched Butterflies (163490), also available as a bundle (163492)

·       Card Stock and Paper: Basic White cardstock (159276); Basic Gray cardstock (121044); Petunia Pop cardstock (163801)

·       Stamp Pads & Ink:  Petunia Pop ink pad (163811); Basic Gray ink pad (149165); Smoky Slate Stampin’ Write Marker (Neutrals set-161697)

·       Tools:  Paper Trimmer (152392); Stampin’ Cut & Emboss Machine (149653); Sketched Butterflies dies (163490), also available as a bundle (163492); Water Painters (151298)

·       Miscellaneous: Stampin’ Seal (152813); Stampin’ Dimensionals (104430); 2024-2026 In Color Shimmer Gems (163781); Wink of Stella (141897)


Measurements:

·       Petunia Pop: 8 ½” x 5 ½” (score at 4 ¼”)

·       Basic Gray:  3 ⅞” x 5 ⅛” (mat)

·       Basic White:  3 ¾” x 5” (card layer)

·       Petunia Pop Shimmer Gems: 3


Instructions:

1.     Fold the Petunia Pop cardstock in half to create the card base.

2.     On the Basic White card layer, stamp the largest butterfly from the Sketched Butterflies set, with Petunia Pop ink. Die cut it out with the coordinating die from the Sketched Butterflies dies.

3.     With a Water Painter, lightly go over the butterfly to blend the ink a bit and fill in the wings with a bit of colour.  When it’s dry, go over the wings with Wink of Stella.

4.     Below where the butterfly was die cut, stamp a sentiment with Basic Gray ink.

5.     Using a Smoky Slate Stampin’ Write Marker, flick the brush tip against the inside of the lid to create a splatter effect all over the white layer.

6.     Glue the white layer to the gray layer and then onto the Petunia Pop card base.

7.     Use Stampin’ Dimensionals to stick the butterfly in the spot where it was die cut from (this will create a shadow effect and you will be able to see the gray layer when you look from the side).

8.     Embellish the card with three Petunia Pop Shimmer Gems. Place 2 to the bottom right of the sentiment and one to the top left of the butterfly.


Happy Stampin' Everyone!!!


Friday, May 24, 2024

Fun Fold Friday- Sweet Peas Window Card


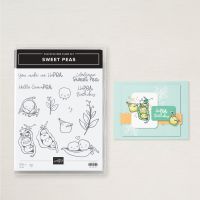
I love a stamp set with a good pun and Sweet Peas is FULL of them. 

"Hello, GrumPEA"

"Welcome Sweet Pea"

"HapPEA Birthday"

"You make me HaPEA"

I made a Baby Card and Birthday card with these sayings, but you could make anything with this Fun Fold Layout inspired by Karen Titus. 


Baby Peas

These "sweet peas" are all snuggled together and make a great baby shower card for either gender. 


I colored them with my Stampin' Blends and fussy cut them out. Then popped them up with dimensionals. 


Once you open the card, you have another spot to open (made out of DSP) with the matching saying. 

Party Peas


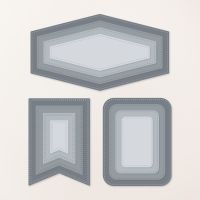
The window is created with the Deckled Circle Dies but you could use the 2 3/8" Circle Punch as well. 


These peas truly look happy and ready to party!


I used the Deckled Circle from the cardbase for the inside for the stamped greeting. Give this a card a try by shopping from my online store.
If you LOVE this stamp set as much as I do, you should join my Card Class Club for June! You'll make 8 eights with 4 designs with this set! 


Supplies


Measurements
Peach Pie Cardbase:  3 1/4" x 11" scored @ 5 1/2
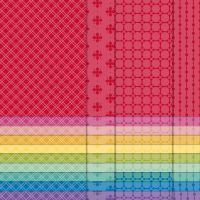
DSP: 6" X 5 1/4" scored @ 3"
3" x 1" or 3" x 1 1/4"
3" x 3/4"
Basic White: 3" x 3"

Steps
  1. Measure, score, and cut your paper. 
  2. Die cut from the front of the cardbase a circle about 2 1/2" in diameter. Keep the cut out piece and stamp on it your greeting with the Memento Black ink. 
  3. Stamp with Memento Ink the pea image onto the Basic White. Color it is with the Stampin' Blends and fussy cut it out with your paper snips. 
  4. Glue the DSP into the Peach Pie. Glue the stamped circle inside of that (see video for tip). 
  5. Attach the peas with dimensionals through the window. Glue the pieces of DSP to the bottom from of the cardbase. 
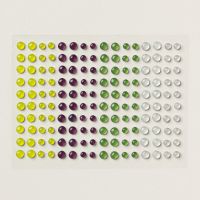
  6. Embellish with the In Color Shimmer Gems. 

Video


Happy Stampin' Everyone!!!


12 Days of Tutorials- Shepherd's Care

  On the Twelfth day of Christmas Tutorials my Stampin' Friend gave to me.... Shepherd's Care  Here is my twelfth and final  card tu...