t> The Joy of Stampin' with Rachael

Friday, January 7, 2022

Fun Fold Friday- Happy Hedgehogs Gift Card Holder


Fun Fold Friday with this "hidden" gift card in the Happy Hedgehogs Hegde!!!
My son loves Hedgehogs, so I knew I had to get this stamp set as soon I saw it in the new Mini Catalog! I paired it with some fun Sale-a-bration items and the Basic Border Dies to create a gift card holding card! 
 

This awesome cloud like paper is the FREE Designer Series Paper found in the Sale-a-bration flyer! It is called Simply Marbleous (and it truly is)! 


I grabbed the saying from the Sale-a-bration stamp set, called Friendly Hello and it is FREE with a $100 order. 


That cute butterfly I stamped directly onto the DSP and colored it in with Stampin' Blends. The second little hedgehog does not have a punch to cut it out perfectly, so watch my video to see my fussy cutting tip! 

Supplies
Happy Hedgehogs Stamp Set
Friendly Hello Sale-a-bration Stamp Set (saying)
Hedgehog Builder Bunch 
Basic Border Dies
Simply Marbleous Sale-a-bration DSP
Paper- Garden Green, Balmy Blue, Crumb Cake
Ink- Memento Black, Soft Suede, Garden Green, Misty Moonlight
Stampin' Blends: Poppy Parade, Pumpkin Pie
Dimensionals

Wink of Stella
Always Recommended
Paper Snips
Trimmer
Simply Shammy
Die Cutting Machine
Bone Folder
Adhesives: Tombow, Tear Tape, Seal, & Dimensionals

Measurements
Balmy Blue Cardbase: 5 1/2 x 8 1/2 scored @ 4 1/4
Crumb Cake: 3 x 4
Garden Green: 5 1/2 x 3
DSP: 4 1/4 x 5 1/2

Steps
  1. Measure, score, and cut your paper. 
  2. Die cut using the stitched scallop border on the Garden Green. Stamp the grass onto it with Garden Green ink. 
  3. Stamp 2 Soft Suede Hedgehogs onto the Crumb Cake cardstock. Punch out the bigger one. 
  4. Punch out with a scrap of paper the back of the hedgehog and line up over the small hedgehog's back. Fussy cut along the back using the punch out as your guide for the scallops. 
  5. Stamp in Missy Moonlight your saying on the top left of the DSP and stamp on the top right the butterfly with Memento Ink. 
  6. Color in the butterfly with Stampin' Blends. 
  7. Glue the DSP to the cardbase front. 
  8. Add dimensionals along the outside of the scalloped grass and avoid the top and center. Then attach to the bottom of the card front. 
  9. Attach hedgehogs with dimensionals. 
  10. Use a little wink of stella onto the butterfly. 

Facebook Live Video


Happy Stampin' Everyone!!!


Tuesday, January 4, 2022

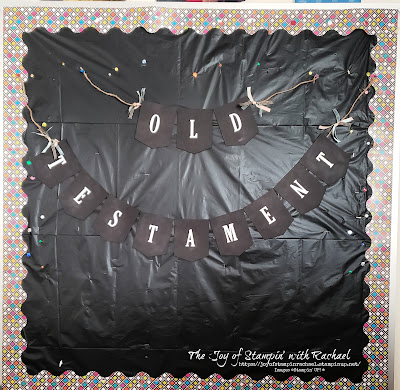
Tuesday's Tip at Ten- Banner Making


Tuesday's Tip at Ten is a tip on how to make a perfect banner! 
I made the banner above for a children' room in my church. Sometimes banners can be tricky to make each banner the same size. 


My tip to help keep them all the same is simple and easy once you know how. 
1. Cut your banner to the size you want (4 1/4 x 5 1/2).
2. Use the Basic Borders Dies on one end and save the end which cut off. 
3. Use that end to line up on the next banner which you are to cut and place the die over it to line it up. 


Here is a close up of the cut off piece over the next banner piece. 


Hope this helps you make you a banner!!!

Happy Stampin' Everyone!!!

Monday, January 3, 2022

Miss Monday - Nuts & Bolts Card


Miss Monday with my last Sneak Peek before the new Mini Jan-June Catalog goes LIVE tomorrow to order from! Today I used the Nuts & Bolts stamp set to make my team card! 


This card is really easy to make and features a new embossing folder...Gingham!


I used the Stampin' Blends to color in the robot and flower. 


I used two dies from the Annual Catalog. The Stitched Rectangles and Hippo & Friends Dies.

Starting January 4th you can order these new items too and make your own Nuts & Bolts cards!

Supplies
Nuts & Bolts Stamp Set 
Gingham Embossing Folder
Stitched Rectangle Dies
Hippo & Friends Dies
Paper- Smoky Slate, Basic White, Polished Pink
Ink- Memento Ink
Stampin' Blends- Smoky Slate, Polished Pink

Always Recommended
Paper Snips
Trimmer
Simply Shammy
Die Cutting Machine
Bone Folder
Adhesives: Tombow, Tear Tape, Seal, & Dimensionals

Measurements
Smoky Slate Cardbase: 5 1/2 x 8 1/2 scored @ 4 1/4
Smoky Slate: 4 x 5 1/4


Steps
  1. Measure, score and cut your paper. 
  2. Die cut out a Basic White label from Hippo & Friends and die cut the Polished Pink using the Stitched Rectangle dies. 
  3. Stamp in Memento ink the robot onto the basic white and color with Blends. 
  4. Stamp in Memento ink the saying " Greetings, Kind Human"
  5. Emboss the Smoky Slate with the Gingham embossing folder.
  6. Assemble: Attach the embossed piece of paper to the cardbase. Attach the robot label with dimenionals. Attach the Polished Pink rectangle with dimenionals. 


Happy Stampin' Everyone!!!


October Card Class Club- Rejoice Christmas Cards

  Here are my Card Class Cards for the month of October using the Rejoice Stamp set to make religious Christmas Cards!  My Kit Class is no l...