

My Stamp Set of the Month for June is the Zany Zoo set! If you order this in June with the Hostess Code, 4WVAFTKP, I'll send you this card kit for FREE! I know the month of July is almost over, but because of shipping delays I am just sharing now. So, if you order this stamp set or bundle in July I will still send the kit to you for FREE!
The Zany Zoo Bundle is amazing! So many little die details like the balloons, table, trees, banner, and all of the dies to cut out the stamped zoo friends and the DSP as well!!!
*These cards were greatly inspired by card swaps and Pinterest and are not my original designs.
Supplies
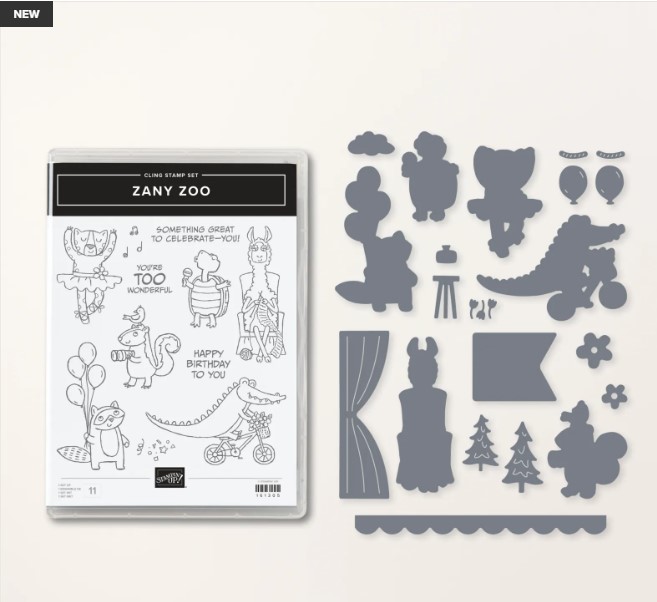
Zany Zoo
Zany Zoo Dies
Stripes & Splatters 3D Embossing Folder
Stylish Shapes Dies
Paper- Zoo Crew DSP, Basic Black, Basic White, Lemon Lime Twist, Pebbled Path, Pool Party, Coastal Cabana, Flirty Flamingo, Pumpkin Pie
Ink- Memento Black, Pebbled Path, Versamark & White Embossing Powder
Stampin' Blends- Smoky Slate, Flirty Flamingo, Petal Pink, Parakeet Party, Pool Party
Ribbon- Parakeet Party Metallic Woven Ribbon, Pool Party Grosgrain Ribbon
Embellishments- Glossy Dots
Stampin' Cut & Emboss Machine
Paper Trimmer
Heat Tool

This first card was inspired by Nancy McArthur. She made this for a swap and I just fell in love with it. The friends in the center are all part of the DSP and were fussy cut out.
*I used a different ribbon for my curtains (see video).

Measurements
Basic Black: 4 1/4" x 5 1/2"
5"x 1 1/2" (die cut and trimmed to 1 inch"
3" x 4" (die cut curtains)
Thick Basic White: 5 1/4" x 8" scored @ 4"
Steps
- Measure, score, and cut your paper.
- Die cut 2 the curtains and 1 scalloped curtain top from the Basic Black.
- Use your bone folder to create curl to your curtains. Wrap around the Parakeet Party ribbon around the center of each curtain. Glue them to the front of the Basic White.
- Fussy cut the singing turtle, beaver and music notes. Glue the beaver and use dimensionals for the turtle and music notes.
- Stamp in the inside the Happy Birthday Greeting.
- Attach the Basic White to the Basic Black matte.

Who doesn't love a knitting llama? This one is just soo cute and the color combos is one of my favorites (Coastal Cabana and Flirty Flamingo). It is hard to see in the picture, but the "wall" behind our llama friend is full of texture (see video). Also, with this card, you have a choice to die cut out the llama from the DSP or stamp it, die cut it, and then color it with the blends.

I am just loving all the details in the dies. This side table, vase, and flowers are adorable and could be used with so many other stamp sets as well.
Measurements
Coastal Cabana Cardbase: 4 1/4" x 11" scored @ 5 1/2"
Basic White: 3 3/4" x 5 1/4"
3 1/4" x 4 3/4" scored @ 1 1/4"
3" x 2" (llama and flowers)
Pebbled Path: 1" x 2"
Flirty Flamingo: 1" x 1" (vase)
3 1/2" x 5" (could die cut vase from the center)
Coastal Cabana: 3/4" x 2 1/4"
Steps
- Measure, score, and cut your paper.
- Die cut the DSP llama or stamp it on Basic White with Memento Ink, color with your blends and die cut it out.
- Emboss the Basic White to the score line.
- Heat embossed with the White Powder onto the Coastal Cabana strip of paper.
- Die cut the stool in Pebbled Path, the vase in Flirty Flamingo, and the flowers in Basic White. Color the flowers with the Stampin' Blends (Flirty Flamingo & Parakeet Party).
- Assemble by gluing the Basic White to the cardbase at an slant. Glue the embossed Basic White to the Flirty Flamingo at a slant and then glue to the Basic White on the cardbase.
- Attach the llama with dimensionals and glue the stool, vase, and flowers next to the llama.
- Attach the greeting with dimensionals.
- Embellish with the Glossy Dots.

This cute card is all about the DSP. I was able to die cut that cute raccoon but had to fussy cut out the rest of his friends. I wanted that raccoon to be the star and so I had him on "double" dimensionals. I stacked one on top of the other to make him just a little bit more taller than his friends.

Those sweet cupcakes in their hands were fussy cut out as well from the DSP and I used them as my "embellishment".
Measurements
Lemon Lime Twist: 5 1/2" x 8 1/2" scored @ 4 1/4"
Pebbled Path: 5" x 3 3/4"
Basic White: 4 7/8" x 3 5/8"
Steps
- Measure, score, and cut your paper.
- Fussy cut 3 party animals from the Zoo Crew DSP and die cut out the raccoon with balloons.
- Fussy cut 3 cupcakes.
- Stamp with the Pebbled Path ink onto the Basic White the greeting in the top right corner.
- Glue the Pebble Path matte to the Basic White and glue to the cardbase.
- Attach each DSP animal with dimensionals but double stack your raccoon balloon dimensionals to make him stand out more than the others.
- Use glue dots to attach the DSP cupcakes to the animal hands and liquid glue one by the stamped greeting.

This foxy card was from a swap and I just love how they created a "spotlight" for the fox by die cutting the DSP with the Stylish Shapes Dies.

This layout is great and could be used with so many of Stampin' UP! Designer Series Paper (on sale in June).
Measurements
Pumpkin Pie Cardbase: 5 1/2" x 8 1/2" scored @ 4 1/4"
Basic White: 2" x 2"
DSP: 1" x 5 1/4"
Pool Party: 1/2" x 3"
Ribbon: 8 to 9 inches
Steps
- Measure, score, and cut your paper.
- Die cut the little circle in Basic White and die cut the DSP fox with a larger circle.
- Stamp in Memento Black the "happy birthday to you" on the Basic White circle.
- Stamp with Pool Party the confetti.
- Glue the DSP to almost the bottom of the cardbase. Glue the pool party above it. Fold the ribbon in half and attach to the back of the DSP circle with dimensionals. Attach the little circle with a dimensional on one side.
- Embellish with the Glossy Dots.
Product List
") |  | |||
 |  | |||
 |  |  | ||
 | ||||
 |  | ") |

 Designer Series Paper")


 Metallic Woven Ribbon")
 Grosgrain Ribbon")
Facebook Live Video
Happy Stampin' Everyone!!!


