t> The Joy of Stampin' with Rachael: June 2021

Wednesday, June 30, 2021

Wednesday's Kit Class- Expressions In Color Paper Pumpkin Extras


I hope you enjoy learning how to make three extra cards using the June Expressions IN Color Paper Pumpkin stamp set. I also show you how to make your own paper using the Alcohol Marker with 91% rubbing Alcohol technique on vellum. 

Get this kit for FREE with a $35 online order using the hostess code/link below by Friday June 2nd. 

Suggested Items
Expressions Refill Kit $10

Vellum $10

In Color Vellum $12

Supplies
Expressions In Color Paper Pumpkin Kit
Vellum
Blends: Evening Evergreen Polish Pink, Pale Papaya, Soft Succulent, & Fresh Freesia 
Tailored Tag Punch 
Penned Dies
Essentials Combo Twine
Opal Rounds
Stitched Rectangle Dies
Ink: Evening Evergreen & Bumblebee 
Cardstock: Basic White, Evening Evergreen, Bumblebee
Evening Evergreen Chevron Weave Ribbon
91% Rubbing Alcohol
straw

Always Recommended
Paper Snips
Trimmer
Simply Shammy
Die Cutting Machine
Bone Folder
Adhesives


This card uses a lot of the floral images for the stamp set to create a pretty background on the cardbase. 


First for the alcohol technique you'll need to attach your vellum with washi tape to the cardbase piece from the kit. 


Then using your blends make little "scribble" marks on the vellum. Next, dip your paint brush into a cup of 91% rubbing alcohol and tap the alcohol over the blend marks. Let dry. 

Measurements
Evening Evergreen Cardbase: 5 1/2 x 8 1/2 scored @ 4 1/4
Vellum: 5 1/2 x 2
Basic White: 4 x 5 1/4

Steps
  1. Measure, score, and cut your paper. 
  2. Follow the steps above to create your vellum alcohol paper. 
  3. Stamp in Evergreen onto the cardbase with the floral images. 
  4. Punch out in Basic White with the Tailored Tag Punch and stamp thanks on it. 
  5. Assemble: attach the vellum to the cardbase with glue dots. Cut 3 inches of ribbon and attach to the tag. Attach the tag with dimensionals. 
  6. Embellish with opal rounds. 


Measurements
Bumblebee Cardbase: 5 1/2 x 8 1/2 scored @ 4 1/4
Basic White: 4 x 5 1/4
1/2 x 2 1/4

Steps
  1. Measure, score and cut your paper. 
  2. Die cut a flower image in the In Color Vellum. 
  3. Stamp in Evergreen the "sending hugs" on the Basic White. 
  4. Stamp in Bumblebee and the Evergreen the spotchy mark  to create the background. 
  5. Assemble: Glue on the Basic White to the Bumblebee. Glue the vellum on. Cut 4 inches of ribbon and glue down over vellum. Use dimesnionals to attach the saying. 
  6. Embellish with Opal Rounds. 


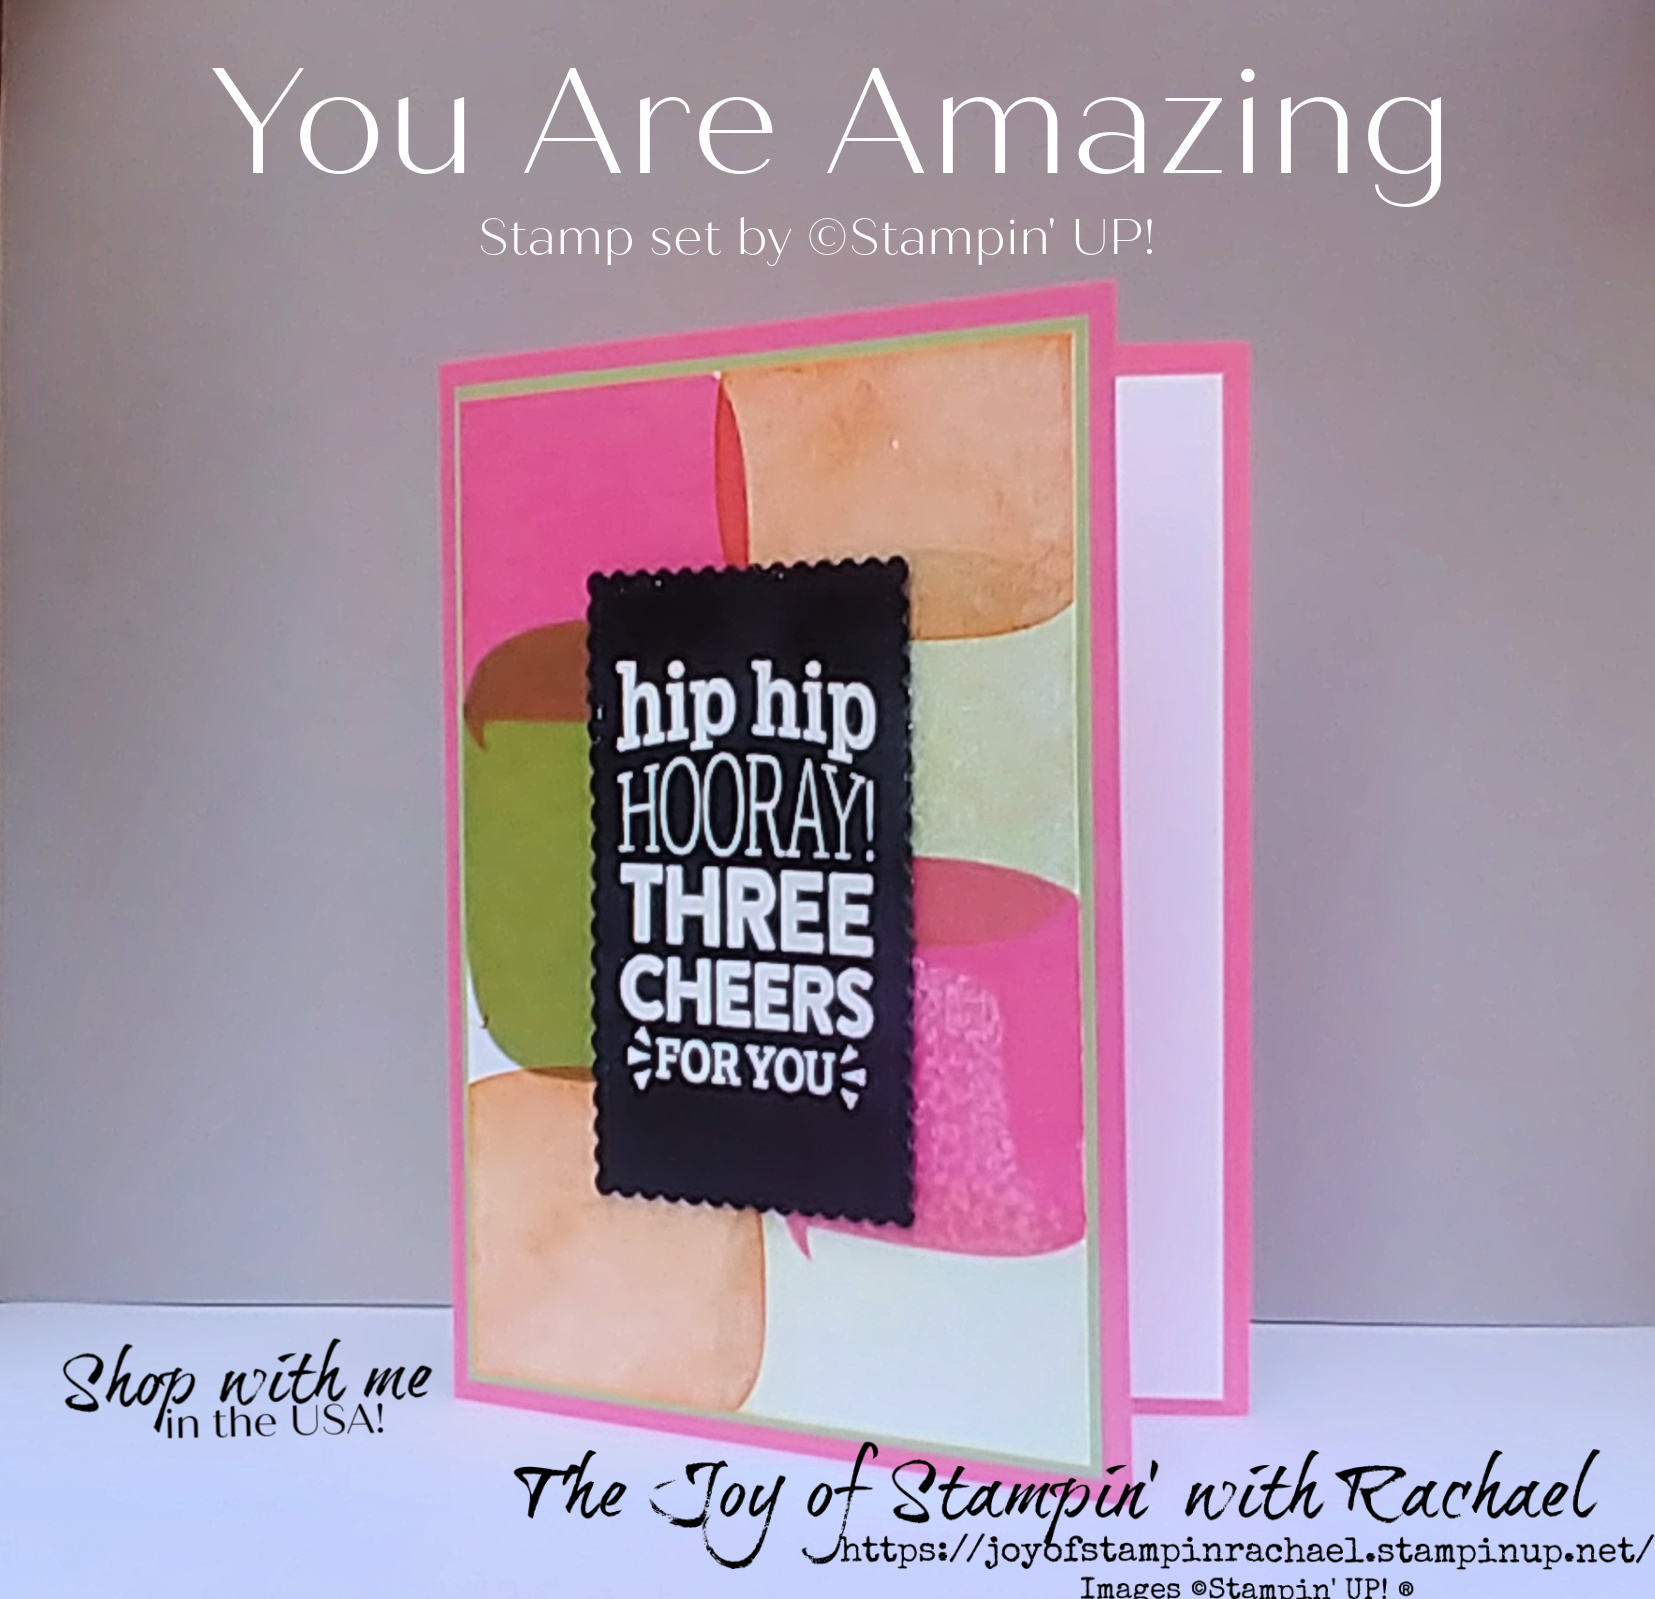
This card using the same technique from above but we adding more colors and I used a spray bottle of rubbing alcohol for this one.  


Start off the same by scribbling with the blends on the 4 1/4 x 5 1/2 of vellum. 


Spray the rubbing alcohol and use a straw to blow the color around. Let dry and die cut out with the stitched rectangle. 


Measurements
Thick Basic White: 5 1/2 x 8 1/2 scored @ 4 1/4
Vellum: 4 x 5 1/4 

Steps
  1. Measure, score and cut the paper. 
  2. Follow the steps above to create the alcohol paper look or watch the video. After it has dried, side cut with the stitched rectangle and die cut a Basic White rectangle as well. 
  3. Attach the rectangle with glue dots and wrap white twine around it. Attach the the cardbase with dimensionals. 
  4. Punch out the tag and stamp in Evergreen the "you are amazing". Attach with dimensionals. 
  5. Embellish with opal rounds. 

Facebook Live Video


Happy Stampin' Everyone!!!


Tuesday, June 29, 2021

Tuesday's Tip at Ten-Triple Tip


Tuesday's Tip at Ten with a Triple Tip from Miss Monday's card. 

1. Use Smoky Slate light blend to outline the bottom half of the butterflies to create depth to your image.
2. Use 1 inch by 2 inch strips of the adhesive backed sheets for the Happy Birthday die cut for easy gluing.  (I got the paper from the scraps when I cut the Basic White as well)
3. Die cut the stitched rectangle from the center of the Basic Black Matte. This helps save paper and no body will ever know you were the wiser. 


Visit yesterday's blog post by scrolling down or click here
https://thejoyofstampinwithrachael2.blogspot.com/2021/06/miss-monday-butterfly-brilliance.html


Happy Stampin' Everyone!!!


Monday, June 28, 2021

Miss Monday- Butterfly Brilliance Birthday Cards


Today's Miss Monday's cards were inspired by the talented Tami White! I made these for a swap that required me to use at least 2 of the 5 colors for the card. So I knew I wanted something I could color with my blends and was able to use 3 of the 5 colors. 

Order Stamp set by clicking below!


The colors I used are: Poppy Parade, Pool Party, Balmy Blue, Pale Papaya, Granny Apple Green and Melon Mambo.


I used the Black Matte Dots to embellish.


I also used the Birthday Chick Dies for the Happy Birthday paper cut out. 


Can you SPOT the difference between these two cards? Let me know in the comments if you can see it! 
You can make these cards too by ordering the supplies from my online store and following the steps below. 

Supplies
Butterfly Brilliance stamp set
Rectangle Stitched Dies
Birthday Chick Dies
Blends: Poppy Parade, Granny Apple Green, Melon Mambo, Pale Papaya, Balmy Blue, Smoky Slate & Pool Party
Cardstock: Thick Basic White, Basic White, & Basic Black
Black Matte Dots
Memento Black Ink
*Stamperatus

Always Recommended
Paper Snips
Trimmer
Simply Shammy
Die Cutting Machine
Bone Folder
Adhesives

Measurements
Thick Basic White Cardbase- 5 1/2 & 8 1/2 scored @ 4 1/4
Basic Black: 4 x 5 1/4
Basic White: 3 3/4 x 5


Steps
  1. Measure, score, and cut your paper. 
  2. Using your stamperatus, stamp your butterflies onto the Basic White. Colors with blends.
  3. Die cut a Basic Black stitched rectangle. 
  4. Die cut in Basic White the Happy Birthday.
  5. Assemble: Glue your Basic Black matte to your stamp butterflies and attach to the cardbase. Add the stitched rectangle with dimensionals and glue the happy birthday. 
  6. Embellish with the Black Matte Dots. 

Happy Stampin' Everyone!!!


Friday, June 25, 2021

Tuesday's Tip at Ten-TOP 5 Cards to Travel With


Have you ever traveled somewhere and wish you had a card to give to someone while you are there? That happens to me all of the time and sometimes I pack prepared and other times I don't. So I've created these Top 5 Cards I highly recommend you pack before you travel!

5. Thank You
While traveling you may be visiting people and staying in their homes. How wonderful would it be if you left them a thank you card to find once you were gone! Also, when traveling you are usually eating out more then usual. I know the hard working waitress (that you will never see again) thank you card will go a long way and you can express how grateful you are for A) not cooking and B) not doing the dishes! 

4. Birthday
A Birthday is bound to happen while you are away. It could someone you know (family member) or someone you just met! Either way, a Birthday card is a must to bring while traveling. I had 4 people that had or will have Birthdays this month at the family reunion I just attended. I could have saved a stamp and hand delivered them. 

3. Thinking of You
When traveling you usually visit family or friends. Because you are near, you find yourself talking more and may discover some hardships they are going through right now. A thinking of you card will mean more than you will ever know. You don't have to say even much in it, because with this one, the thought really does count. 

2. Holiday
Before you head out, think what Holidays may occur while you are away. For example, I was gone over Father's Day and packed 3 Father's Day cards to give to the Fathers in my family that would be there too! One family member commented "that they wish they would have thought of that." So look at the calendar and pack for the nearest Holiday. 

1. Blank
Bring a blank or card two! No words on it, just pretty stamped images. Have this be your wild card and you can use it for ANYTHING. Some examples would be for someone who just had a baby, a wedding, or even hand write congrats in the inside for something wonderful that happened to someone (graduation, new job, etc.). You can't go wrong with a blank (no words) card. But just be really thoughtful with what you write inside. 


Safe Travels and...
Happy Stampin' Everyone!!!

Fun Fold Friday- Turtle Friends Easel Card


Fun Fold Friday with this super adorable turtle from the Turtle Friends stamp set. This Fun Fold is a combination of two folds. It has similar measurements to a Z fold or what I call a 2 3/4 card but also pops up to an Easel card as well. I am making these cute guy for a card swap and love how easy the turtle is to make with the Turtle Punch. 

Bundle and Save 10%


Here is what the card looks like when you unfold it completely. There is a little spot to write on where you see the solid cardstock in the center. 


Once opened you can lay the bottom flat and stick the turtle panel behind the Birthday message to form an easel. I kept this cute guy pretty simple but you could dress him up with a party hat. 
You can make this card too when you shop with me at my online store and by watching the video below. 

Supplies
Turtle Friends stamp set
Turtle Punch
Painted Texture Embossing Folder
DSP: Pattern Party
Cardstock: Pool Party, Pear Pizzazz or Granny Apple Green
Ink: Granny Apple Green
Dimensionals


Always Recommended
Paper Snips
Trimmer
Simply Shammy
Die Cutting Machine
Bone Folder
Adhesives

Measurements
Pear Pizzazz Cardbase: 4 1/4 x 11 scored @ 5 1/2 & 2 3/4
DSP: 3 7/8 x 5 1/8
3 7/8 x 2 5/8
Pool Party: 4 x 5 1/4
2- 4 x 2 1/2
1 7/8 x 3 7/8
3/4 x 2 5/8
Pear Pizzazz: 2 x 4
2 3/4 x 1

Steps
  1. Measure, score, and cut your paper. 
  2. Glue your Pool Party to the matching DSP mattes and glue to the cardbase. 
  3. Emboss with the Painted Texture folder the 1 7/8 x 3 7/8 Pool Party. Attach the the 4 x 2 Pear Pizzazz.
  4. Stamp on a piece of Pear the turtle and shell in Granny Apple Green and punch him out. Attach him with dimensionals. Then attach the whole embossed piece with dimensionals on top the the DSP on the front of the card (see video). 
  5.  Stamp on Pool Party in Granny Apple Green the Birthday saying and glue it to the Pear matte. Then attach it with dimensionals on the inside to create a spot to create the easel.

Facebook Live Video


Happy Stampin' Everyone!!!

Thursday, June 24, 2021

Throwback Thursday-Playful Pets Paper


Throwback Thursday with the Playful Pets DSP that just retired in end of May! Our family dog, Lily, has had some health issues (enlarged heart and fluid in her lungs) recently right before we were going to leave for our Family Reunion at Lake Powell. We didn't want to board her and didn't think it was wise for her to come (too much stress on her healing body) and so we took her to some friends house where she could be watched while we were away. They took such good care of her and needless to say, we were super grateful! So, quickly I whipped up this Playful Pets DSP card! It literally took me under 5 minutes to make. No Pinterest inspiration needed this time. It is a very basic layout. DSP with a matte. Punched hearts in DSP and in cardstock and a very simple bow. This layout would be great with lots of different Stampin' UP! DSP's and there was NO STAMPING done to make this card. 

Sometimes simple is best! 

Lily Dog doing well and visiting Home Depot. 


Happy Stampin' Everyone!!!


Wednesday, June 23, 2021

Wednesday's Kit Class- Hey Chick Cards


Hey Chick is a fun stamp set and dies that will be retiring after June 30th! I wanted to play with and share it with you one more time! Order from my online store between now (6/23) through Friday (6/25) $35 worth using the Hostess Code and get this paper kit for FREE! If you want FREE shipping as well, increase your order to $50 and order on Thursday and Stampin' UP! will give you FREE shipping! 

Use this link to order

Suggested Items
Hey Chick Bundle $44

Supplies
Hey Chick stamp set
Chick Dies
*Layering Oval Dies
Rectangle Stitched Dies
Brights DSP
Cardstock: Crumb Cake, Basic White, Basic Black, Poppy Parade, Soft Suede, Granny Apple Green
Inks: Soft Suede, Memento Ink, & Crumb Cake
*Bumblebee Ribbon
Blends: Mango Melody & Poppy Parade 

*retired 


This is my simple card. I created the little chicken feed with a die and slipped some paper behind to change the color. 


I just LOVE the barn die that has so much detail. 

Measurements
Crumb Cake Cardbase: 5 1/2 x 8 1/2 scored @ 4 1/4
Crumb Cake: 4 1/4 x 5 1/2
DSP: 3 x 3/4

Steps
  1. Measure, score, and cut your paper. 
  2. Die cut your barn in Soft Suede
  3. Stamp in Memento Ink the hen onto Basic White, color with blends, and die cut. 
  4. Die cut 3 of the seed dies on the Crumb Cake and glue the DSP strip behind it. 
  5. Sponge in Crumb Cake around the Crumb Cake and around the seeds. 
  6. Stamp your greeting on the bottom left corner in Soft Suede.
  7. Assemble: Attach the Crumb Cake to the cardbase. Glue on your barn and attach your hen with dimensionals. 


This cute corn card is also an easy Fun Fold! 


I just love all of the detail in these corn dies. The corn is even embossed to see the little kernels. The sign is even embossed. 

Measurements
Crumb Cake Cardbase: 5 1/2 x 8 1/2 scored at 4 1/4 & 3 1/4
2 Basic White: 3 1/8 x 5 3/8
Mango Melody DSP: 3 x 5 1/4

Steps
  1. Measure, score, and cut your paper. 
  2. Stamp in Memento Ink your chick, color, and die cut it out. 
  3. Die cut a Stitched Rectangle in Basic White. 
  4. Die cut the sign in Crumb Cake and stamp in Soft Suede the Hey Chick. 
  5. Die cut the corn stalks in Granny Apple Green. 
  6. Die cut the corn in Mango Melody. 
  7. Attach the ribbon between the 2 score lines and glue that down to the back of the cardbase. 
  8. Assemble: Glue your Basic White to the DSP and one to the inside. Glue your corn stalks, corn to the stitched rectangle. Use dimensionals for the chick and sign. Glue the whole piece to the DSP. 


This card shows how you can use the images to create a background like as well. 


Measurements
Poppy Parade Cardbase: 4 1/4 x 11 scored @ 5 1/2
Basic Black & Basic White: 4 x 5 1/4
Crumb Cake: 3 3/4 x 5

Steps
  1. Measure, score, and cut your paper with your paper trimmer. 
  2. Die cut your Basic Black to for the chick wire.
  3. Die cut 2 Basic White eggs. 
  4. Die cut your ovals with Poppy, Black, and White. (Could use circle dies instead)
  5. Stamp you hen in Memento Ink and die cut and color it with blends. 
  6. Stamp your saying on the bottom of the oval. 
  7. Stamp on the Crumb Cake in Soft Suede Ink hens all over. 
  8. Assemble: Glue your mattes together and attach to the cardbase. Attach the chicken wire with a glue dot. Glue your oval layers together and attach with dimensionals. 
Facebook Live Video


Happy Stampin' Everyone!!!


Monday, June 21, 2021

Miss Monday- You Are Amazing Card


Today's Miss Monday Cards were created from a Team Color Challenge given from my upline Melanie! I knew I wanted to play with the You Are Amazing stamp set one more time before it retired and this color challenge was perfect for it. 


The colors we were suppose to use were the "P" colors. Polished Pink, Pumpkin Pie and Pear Pizzazz. 
 

To make it more fun I switched out the cardbase and matte colors. 


Here is the Polish Pink cardbase. 


Here is the Pear Pizzazz cardbase.


I added that center Stitched So Sweetly Basic Black with the white embossed letters to make it really pop! I truly love the result and am so card I took part of this color challenge! 

You can make this card too when you order from my Online Store and follow the steps below. 

Supplies
*You are Amazing stamp set
Stitched So Sweetly Dies
Cardstock-Basic Black, Basic White, Pear Pizzazz, & Polished Pink
Inks- Versamark, Pumpkin Pie, Pear Pizzazz, & Polished Pink
White Embossing Powder
*Retiring

Always Recommended
Paper Snips
Trimmer
Simply Shammy
Die Cutting Machine
Bone Folder
Adhesives

Measurements
Cardbase: 5 1/2 x 8 1/2 scored @ 4 1/4
Basic White & Matte: 4 x 5 1/4
Basic White: 3 7/8 x 5 3/8

Steps
  1. Measure, cut and score you paper with your paper trimmer. 
  2. Stamp on the smaller Basic White the fun word bubble image. Stamp 2 of each color and 3 of one. Leave some white space (I didn't leave the white space for one and just prefer the look). 
  3. Die cut the scalloped rectangle from the Stitched So Sweetly dies and heat emboss with your Versamark, white embossing powder and heating tool. 
  4. Assemble: glue your matte to the stamped image. Glue that to the cardbase front. Glue the Basic White to the inside. Use dimensionals to attach the Basic Black rectangle. 

Happy Stampin' Everyone!!!


Tuesday, June 15, 2021

Tuesday's Tip at Ten-What do pack in your Stampin' Travel Bag


Tis the season for lots of traveling! The Summer is here and people are traveling more! I am traveling this week and was getting ready to pack my Stampin' travel bag. Because you know I can't not stamp for 6 days! Below are some items that I highly suggest you pack.

Kits/Paper Pumpkin 
First you will need something to work on. Kits that are precut and are all inclusive are perfect and usually don't take up much space (just a little box). It is a great time to dust off those unfinished kits or try one of the new online ones. 

Paper Pumpkin $22

Online Kits $12-$19

Mini Bag
Everyone should include a mini bag of supplies or must have items. Those would include (but not limited to)...

Paper Snips
Adhesives (glue dots, liquid glue, dimensionals, seal, etc.)
Ink (color of choice)
wipes
clear block(s)

If you include these items you are sure to have hours of fun while you are out traveling this year! I have forgotten a clear block before and had to get really creative (bottom of a glass cup)! 
What would you included in your to Go Craft Bag?

Happy Stampin' Everyone!!!


Monday, June 14, 2021

Miss Monday- Stellar Birthday & To The Moon


Today's Miss Monday features two new stamp sets with a "spacey" feel to them! Stellar Birthday and To The Moon. My husband is switching over to the Space Force this week and so I knew I needed both of this space themed sets. I made this little girl Birthday card mostly fun looking with the Stellar Birthday but check out that giant moon! That is from the To The Moon stamp set and just adds so much to this card! Scroll down to see the slight differences between the two cards and to get all the measurements and steps on how to create this card in your craft room. 


The Stella Birthday stamp set is the "star" of this card and this is only some of the great images from this set. See the whole stamp set over at my online store by clicking below. 


I used my Stampin' Blends to color in our cute space girl. 
https://www.stampinup.com/categories/shop-products/featured-products/ink-coloring/markers-more/alcohol-markers?demoid=2130375


This is also a little Space Dude that you could color and attach to your cards. The big difference to my girls today is their hair color and space belt. 


I used the planets stamp to create the fun background and used my diagonal/triangle method to make it look random. I started at the top left and stamped down at a diagonal. Then based off of those first images I stamped I would make triangles with them and make sure no "planets" align. 


For the moon I tried two different things. I used Basic Gray for both cards but I stamped one on Basic White and one on Smoky Slate. Then the Basic White Moon (with the brown hair girl) I popped up with dimensionals. Which one do you like better? The brunette or blonde? 

Supplies
Stellar Birthday stamp set
To The Moon stamp set
Cardstock: Blackberry Bliss, Basic White, Smoky Slate and Highland Heather
Ink: Blackberry Bliss, Memento Black Ink, & Smoky Slate
Opal Rounds
Layering Circle Dies
Rectangle Stitched Dies
Blends: Smoky Slate, Night of Navy, Balmy Blue, Soft Suede, Daffodil Delight, Blackberry Bliss, Highland Heather, & Ivory. 

Always Recommended
Paper Snips
Trimmer
Simply Shammy
Die Cutting Machine
Bone Folder
Adhesives

Measurements
Blackberry Bliss Cardbase: 5 1/2 x 8 1/2 scored @ 4 1/4
Highland Heather & Basic White: 4 x 5 1/4

Steps
  1. Measure, score and cut your paper. 
  2. Die cut a Basic White Stitched Rectangle and stamp in Blackberry Bliss "Have a Stellar Birthday".
  3. Stamp on Basic White/Smoky Slate your moon with Basic Gray. Either fussy cut it out or use your circle dies to cut it out (I used the dies because my circle cutting can't be trusted).
  4. Stamp on Basic White your cute space girl with memento ink and color with blends. Then fussy cut her out with your paper snips. 
  5. Create your own background with the Blackberry Bliss ink onto the Highland Heather paper. Glue to the cardbase.
  6. Stamp little stars in the corners of the Basic White for the inside of the card. 
  7. Assemble: Use dimensionals to attach the moon, girl and saying. 
  8. Embellish with the Opal Rounds. 

Happy Stampin' Everyone!!!


Saturday, June 12, 2021

Royals Team Kit-All For Baby


I am just loving this All For Baby stamp set by Stampin' UP! I've been out of the "baby card" making business for a little. Not many of my friends are having kids now a days (I am getting old). But now nieces and nephew are having babies (crazy right)!!! I made these for my Royals Hearts Stampers team kit class and there is a video at the bottom you can watch to learn how. Mind you, I used some of the retired In Colors because the soon to be retiring Hydrangea Hill DSP had the best "baby colors". But you could substitute the DSP and colors for whatever shades of pink and blues you have. 

Supplies
All For Baby stamp set
Baby Clothes Dies
Stitched So Sweetly Dies
Rectangle Stitched Dies
**Hydrangea Hill DSP
Cardstock: *Seaside Spray, *Rococo Rose, Basic White, Highland Heather, Gorgeous Grape& Night of Navy
Ink: Crumb Cake, *Seaside Spray, Daffodil Delight, Highland Heather, & *Rococo Rose
Ornate Floral 3D Embossing Folder
Tasteful Textile 3D Embossing Folder
Versamark & White Embossing Powder

Always Recommended
Paper Snips
Trimmer
Simply Shammy
Die Cutting Machine
Bone Folder
Adhesives


This card was inspired by the talented Brian King. I love the little baby clothes die cut out and hanging on the line. 


This card uses all current colors and is pretty baby gender neutral. 


Don't forget to stamp the inside of your cards. 

Measurements
Highland Heather Cardbase: 5 1/2 x 8 1/2 scored @ 4 1/4
DSP: 4 x 5 1/4
Basic White: 4 x 5 1/4
4 1/2 x 3 1/4

Steps
  1. Measure, score, and cut your paper.
  2. Glue the DSP to the card front.
  3. Stamp your outfits in Daffodil Delight, Highland Heather, and Seaside Spray (or choice of blue).  Then die cut them out. Stamp the star and pocket and die those out. Die cut the heart in Gorgeous Grape cardstock.
  4. Stamp in Heather the saying and stamp below that the clothes line in Crumb Cake.
  5. Die cut the clothes pins in Crumb Cake. 
  6. Glue the clothes to the line and then glue on the clothes pins. 
  7. Attach with dimensionals. 
  8. Stamp on the Basic White for the inside and glue that in. 


Who doesn't love a sweet teddy bear? This fun one is made using Crumb Cake and is stamped just one time. This is a disinktive style stamp set which creates color layers with just one stamp.


The inside left has been stamped and the right has been embossed on the left. 


I made this card in both a pink and blue to be more gender specific. 

Measurements
Rococo Rose Cardbase: 4 1/4 x 11 scored @ 5 1/2
Basic White: 4 x 5 1/4
DSP: 4 x 2 1/2

Steps
  1. Measure, score, and cut your paper. 
  2. Take your card base and cut off 2 3/4 from the front. 
  3. Die cut the Stitched So Sweetly scalloped rectangle in Rose and die cut the rectangle in Basic White.
  4. Stamp the bear in Crumb Cake and Stamp the bow in Rose. Die cut both those out and attach bow to bear.
  5. Emboss half of your Basic White (about 2 3/4) and then stamp on the left side. Glue to the inside of the card.
  6. Attach your DSP. Glue your layers together. Attach Bear with dimensionals. 


This one I used the retired Seaside Spray and love the softness of this blue. Another good blue is Balmy Blue or even Pool Party. 


Click on the image to see the Tasteful Textile embossing folder. 

Measurements
Seaside Spray Cardbase: 4 1/4 x 11 scored @ 5 1/2
Basic White: 4 x 5 1/4
DSP: 4 x 2 1/2

Steps
  1. Measure, score, and cut your paper. 
  2. Take your card base and cut off 2 3/4 from the front. 
  3. Die cut the Stitched So Sweetly scalloped rectangle in Seaside and die cut the rectangle in Basic White.
  4. Stamp the bear in Crumb Cake and Stamp the bow in Seaside. Die cut both those out and attach bow to bear.
  5. Emboss half of your Basic White (about 2 3/4) and then stamp on the left side. Glue to the inside of the card.
  6. Attach your DSP. Glue your layers together. Attach Bear with dimensionals. 


One thing every expecting Mother needs is are baby thank you cards! They can use this for baby shower thank you cards or even when someone helps after baby has arrived. 


Measurements
Night of Navy Cardbase: 5 1/2 x 8 1/2 scored @ 4 1/4
Night of Navy & Basic White: 4 x 5 1/4
Seaside Spray: 1/2 x 2 1/4

Steps
  1. Measure, score, and cut your paper. 
  2. Emboss with the Ornate Floral the Nigh of Navy 4 x 5 1/4 and attach to the cardbase.
  3. Use white embossing powder and Versamark on your Seaside Spray for your "thank you".  Trim to size. 
  4. Die cut a scalloped rectangle in Basic White. Die cut 3 white hangers. Die cut 3 onesies (Gorgeous Grape, Seaside Spray, and DSP). 
  5. Attach your Basic White scallop rectangle with dimensionals. 
  6. Glue white hangers to the back of the onesies. Then glue on the back 2 first and use dimensionals to attach the DSP one to the front. 
  7. Attach your "thank you" with dimensionals. 

Facebook Live Video


Happy Stampin' Everyone!!!


Onstage 2024 Swaps

  * I was so lucky and was able to attend the Stampin' UP! Onstage Event at Houston Texas this month! Onstage is ran by Stampin' UP!...