t> The Joy of Stampin' with Rachael

Friday, March 7, 2025

Double Feature Friday- Cards with Leaves


Double Feature Friday with cards with Leaves! 
Check out these two cards made by the Stamp & Share Crew Design Team! I think you are going to "leaf" them!


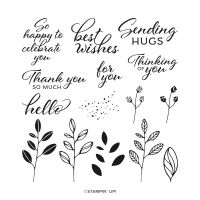
Natural Botanicals

All images © 1990-2025 Stampin’ Up! ®


Supplies:


·       Stamp Sets: Natural Botanicals (164831),

·       Simply Said (163756)

·       Card Stock and Paper: Petunia Pop (163801), Basic Black (121045), Basic White (159276), Botanical Textures Designer Paper (165545)

·       Stamp Pads: Petunia Pop (163807), Memento Ink (132708)

·       Tools:

·       Miscellaneous: Petunia Pop Bordered Ribbon (163785), Adhesive Back Sparkle Gems (161288), Bakers Twine Three Color Pack (162759), (Stampin’ Dimensionals (104430); Stampin’ Seal Adhesive (152813)


Measurements:


·       Basic Black 8 ½ x 5 ½

·       Petunia Pop 4 x 5 ¼

·       Designer Paper 3 7/8 x 5 1/8

·       Petunia Pop 2 7/8 x 3 5/8

·       Basic White 2 ¾ x 3 ½


Instructions:


1.     Add DSP to Petunia Pop.

2.     Wrap Petunia Pop ribbon around layer DSP layer and add to card base

3.     Stamp leaf in Petunia Pop ink and sentiment in Memento on Back White

4.     Add to Petunia Pop and attach to card with Dimensionals

5.     Wrap Bakers Twine around Petunia ribbon, tie a bow

6.     Add gems to card as desired 


Mixed Florals, Great Friend

All images © 1990-2025 Stampin’ Up!®


Supplies:

·       Stamp Sets: Mixed Florals Photopolymer Stamp Set (164639) or 10% off with dies (164642), Mixed Labels Cling Stamp Set (164643)

·       Cardstock & Paper: Basic White Cardstock (159276), Mixed Media Florals 12” x 12” Designer Series Paper (164638), Poppy Parade Cardstock (159276)

·       Stamp Pad: Tuxedo Black Memento Ink Pad (132708), Mossy Meadow Stampin’ Blends Combo Pack (154890)

·       Tools: Mixed Florals Dies (164641) or 10% off with stamps (164642), 2 3/8” Circle Punch (161354), Take Your Pick Tool (144107), Bone Folder (102300), Paper Snips Scissors (103579), Paper Trimmer (152392), Clear Block D (118485)

·       Miscellaneous: Linen Thread (104199), Low-Profile Dots (164658), Stampin’ Dimensionals (104430), Mini Stampin’ Dimensionals (144108), Mini Glue Dots (103683), Multipurpose Liquid Glue (110755)


Measurements:

·       Basic White: 5 ½” x 8 ½” scored at 4 ¼”, folded then burnished with the Bone Folder (card base), 3 ¼” x 4 ½” (card front), 2 - 2” x 4 ¼”, ½” x 2”,

·       Mixed Media Florals 12” x 12” Designer Series Paper (DSP), Petal Pink stripes print: 3 ¾” x 4 ½”, card front

·       Mixed Media Florals 12” x 12” DSP, black & white floral print: 3” x 3”

·       Mixed Media Florals 12” x 12” DSP, Poppy Parade-Petal Pink-Daffodil Delight paint brush print: ½” x 3”

·       Poppy Parade: ½” x 3”

·       Linen Thread: 14”

·       Low-Profile Dots: 3


Instructions:

1.     Fold the Basic White card base in half and burnish the fold.

2.     Adhere the Petal Pink stripes DSP to 3 ¼” x 4 ½” Basic White card front and attach it to the card base with Stampin’ Dimensionals.

3.     Punch a circle from the 3” x 3” black & white floral print DSP and adhere it to the card front.

4.     Stamp the branches using the Tuxedo Black Memento Ink Pad, color them using the Stampin’ Blends, and die cut the images.

5.     Tie a bow with Linen Thread, then attach it to the card front in the lower left section of the DSP circle with a Mini Glue Dot.

6.     Adhere branches together, slightly overlapped, and attach the die cut images to the card front using Dimensionals.

7.     Cut ends of the Poppy Parade Cardstock and the remaining DSP piece at an angle. Adhere them together, overlapping about ¼”and so that the ends do not line up.

8.     Stamp sentiment on Basic White Cardstock with Tuxedo Black Memento Ink and trim ends to size.

9.     Adhere sentiment to the Poppy Parade and DSP strip piece and attach to the card front with Dimensionals.

10. Attach Low-Profile Dots.

 Happy Stampin' Everyone!!!


Fun Fold Friday- Thinking of You Corner Card


Fun Fold Friday with my Demo Swap Creation! 
Here was the criteria for this Swap
Had to...
*Use the Subtles Color Family (Lost Lagoon, Calypso Coral, & Petal Pink)
*Had to be a Corner Fold
*Need some Heat Embossing (Gold Embossing for text)
*Must use a die shape (Spotlight on Nature Dies for the circle)
*A Thinking of you Card


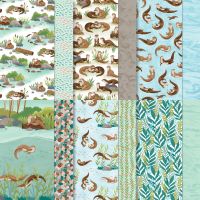
I LOVE how this one turned out. I choose the Otterly Adorable DSP because A) I have a ridiculous amount of that DSP leftover and B) It had some of the Subtle colors in it! 


My favorite part of this Fun Fold is the inside where we can see the DSP flip!


I thought this card was going to be pretty hard. In fact, I tried to make it once before and failed completely. But I followed a great tutorial and watched a video and that really helped me! I hope my video and steps below do just that for YOU!


Supplies


Measurements
Lost Lagoon: 5 1/2" x 8 1/2" scored @ 4 1/4"
Basic White: 4" x 5 1/4", 2 3/4" x 2 3/4"
Calypso Coral: 2 1/2" x 2 1/2" 
Petal Pink: 2" x 2"
DSP: 4" x 5 1/4"

Steps
  1. Measure, score, and cut your paper. 
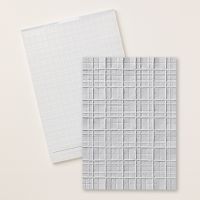
  2. Dry emboss the Calypso Coral with Forever Plaid. 
  3. Die cut the Petal Pink with the lined circle. Heat embossing the "thinking of you" with Gold Power, Versamark, and the Heat Tool. 
  4. Glue the DSP to the cardbase. Measure 3 inches from the 5 1/2" top left edge (see video). I used a 3" x 3" Post It Note as a visual reference. Go to the 3" mark on the paper trimmer clear guide (the number by the cutting blade). Cut until the 5/8" mark. Turn paper and do the same thing to the other side going in 3 inches. Flip the corner down and burnish the fold with a Bone Folder.
  5. Use a Mini Glue Dot glue behind the flipped corner to secure down. 
  6. Glue the Basic White to the Calypso Coral square and glue to the corner of the card (two ways to line it up, see video). Glue the Basic White to the inside of the card. 
  7. Attach the embossed circle with Dimenionals. 
  8. Embellish with 3 gems. 

Video


  March 2025 Rewards

πŸ’š Spend $15 and get the March Layout Love pdf 
πŸ’š Spend at least $50 and get my Happy Mail Gift & Card 
πŸ’šSpend $150 or more and receive Stampin’ Rewards


Happy Stampin' Everyone!!!
Tuesday, March 4, 2025

Tuesday's Tip at Ten- Tear Tape Stickers


Tuesday's Tip at Ten...
Make your own sticker backings with Tear Tape!


Stampin' UP! has amazing Adhesive Backed Sticker Sheets but I ran out. 
So, I did what any stamper would do, and created my own using Tear Tape! 
I put the Tear Tape on the back of the cardstock. Ran it through Stampin' Cut & Emboss Machine with the Mini Alphabet Dies and POOF! 
My own letter stickers all ready for me to use! 

What did I stick the letters on??? You'll have to wait until after Onstage next week. They are part of a roommate gift! 

Happy Stampin' Everyone!!!

 

August Card Class Club- Silly Old Bear

  Click HERE to join!