Perfectly Pears
All
images © 1990-2025 Stampin’ Up!®
·
Stamp Sets: Perfectly Pears Bundle (166154)
·
Card Stock and Paper: Secret
Sea (165624); Basic White (166780); Painterly Pears Designer Series Paper (DSP)
(166146)
·
Stamp Pads: Secret Sea (165285); Garden
Green (147089); Petal Pink (147108)
·
Tools: Traditional Labels Dies (165864);
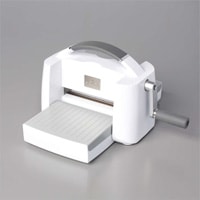
Stampin’ Cut & Emboss Machine (149653)
·
Miscellaneous: Stampin’ Blends in Pecan Pie (161674), Granny Apple
Green (154885), and Pretty Peacock (161676); Charming Shimmer Dots (164139); Stampin’
Dimensionals (104430); Stampin’ SEAL (152813)
Measurements:
·
Secret Sea: 5 ½” x 8 ½” card base
· Basic White: 2 ½” x 3 ½” for
label, 2” x 2 ¼” for pears
· Painterly Pears DSP: 4” x 6”
Instructions:
1. Score Secret Sea card base
on the long side at 4 ¼” and fold.
2. Take
your piece of DSP and tear it on the long side about 1/3” of the way down.
Then, flip the top over to the other print and adhere to the top half of the
card front. Take the other half of the DSP layer and adhere it to the bottom of
the card front. The two pieces of DSP will overlap in the middle.
3. Die
cut one of the Traditional Labels dies for your sentiment using 2 ½” x 3 ½”
Basic White cardstock.
4. Stamp
the sentiment on your label using Secret Sea ink. Then, stamp the splatter
image and flower image on the label using Petal Pink ink.
5. Stamp
the pears on the other piece of Basic White cardstock and color using the
Stampin’ Blends listed.
6. Die
cut the pear image using the coordinating die.
7. Attach
the pear image to the card front using Stampin’ Dimensionals.
8. Lastly,
add a few Charming Shimmer Dots to finish the card.

Perfectly Pears
All
images © 1990-2025 Stampin’ Up!®
Supplies:
·
Stamp Sets: Perfectly Pears Stamp/Die Bundle Set (166154)
·
Card Stock and Paper: Basic Beige CS (164511); Old
Olive CS (100702); Basic White CS (166780); Painterly Pears DSP (166146)
·
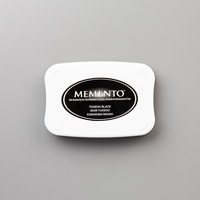
Stamp Pads: Tuxedo Black Memento Ink
(132708)
·
Tools: Nested Essentials Dies (161597)
·
Miscellaneous: Rhinestone Basic Jewels (144220);
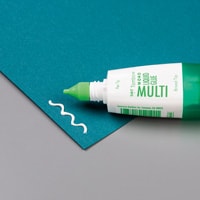
Stampin’ Dimensionals (104430); Stampin’ Seal Adhesive (152813); Multipurpose
Liquid Glue (110755)
Measurements:
·
Basic Beige CS: 5 ½” x 7 ¾” scored at 3 ½” (base) and 2 ¾” x 3 ¼”
to die cut
·
Old Olive CS: 3 ¼” x 4 ¼”
·
Basic White CS: scraps to die cut
·
Painterly Pears DSP: 3” x 4”; ½” x 5 ¼” and die cut pear and stem
with leaves
Instructions:
1. Fold base with shorter side
to the front – card base is vertical. Adhere
the strip of DSP to the section on the right of the card base centered.
2. Adhere the DSP rectangle to
the piece of Old Olive – then add to the card front centering top and bottom
and all the way over to the right edge of the card front.
3. Die cut the largest rounded
corner rectangle out of the Basic Beige rectangle and adhere as shown – over-lapping
the card front and the section to the right – be sure to only put adhesive on
the part attached to the card front.
4. Die cut the pear and the
stem with leaves from the DSP. Use a dab
of Multipurpose Liquid Glue on the top front of the pear and add the stem. Pop the pear with the stem and leaves using
Stampin’ Dimensionals.
5. Die cut three of the small
flowers and the larger of the sentiment layers from Basic White CS – Stamp the
Hello sentiment using Tuxedo Black Memento Ink and adhere tucking under the
Pear stem. Add the three flowers as
shown and then add a small Rhinestone Basic Jewels to the center of each
flower.
6. Complete the inside and the
envelope as desired.