t> The Joy of Stampin' with Rachael

Wednesday, November 12, 2025

Banner Saying Birthday Card


Stampin' UP! just released some new products. 
I took the brand new Banner Sayings and paired it with some Designer Series Paper and Embossing Folder to create this "teen" Birthday card! 


This is a punch bundle. The bunch has 3 different banner styles that match the sizes of the stamps! There are so many fun possibilities! 

Banner Sayings

All images © 1990-2025 Stampin’ Up!®


Supplies:


·       Stamp Sets: Banner Sayings (167044)

·       Card Stock and Paper: Granny Apple Green (CS) (146990); Basic White (166780); Turtle-y Cute Designer Series Paper (DSP) (165221)

·       Stamp Pads: Garden Green (147089)

·       Tools: Stylish Shapes Dies (159183); Three Banner Punch (167050); Turtle Textures Embossing Folder (165232)

·       Miscellaneous: Shades of Green Hexagons (165233); Stampin’ Dimensionals (104430); Stampin’ Seal Adhesive (152813)


Measurements:


·       Granny Apple Green: 5 ½” x 8 ½” scored @ 4 ¼”, 4” x 5 ¼”

·       Basic White: 1” x 3”

·       DSP: 3” x 3” (turtle with ice cream), 2 ½” x 2 ½” (turtle shells), 2” x 2” (stripes)


Instructions:


1.     Measure, score, and cut your paper.

2.     Die cut the DSP with the Stylish Shapes Dies.

3.     Dry emboss the Granny Apple Green 4” x 5 ¼” with the Turtle Textures Embossing Folder and attach to the card base front.

4.     Stamp the Basic White with the Garden Green ink “Happy Birthday”. Use the center banner punch from the trio to punch out the banner with both ends flagged.

5.     Attach the DSP circles with Stampin’ Dimensionals and then the banner saying with Stampin’ Dimensionals.

6.     Embellish with 3 of the Shades of Green Hexagons. 


Happy Stampin' Everyone!!!


Friday, November 7, 2025

Coast 2 Coast Christmas- Week 6


Hello Stampin' Friend! 
I would like to invite you to join my Coast 2 Coast Christmas Card Series!
Starting October 3rd through November 7th, I'll be sending out weekly emails with a FULL video on how to make 2 cards. Each week will feature a new designer but all are using the same 4 stamp sets!

Click HERE to sign up for this 6 week email series to get FULL video Tutorials.

GET THE PDF FOR FREE WITH 
$50 order by November 7th!
Use links below to shop these products!


Front of the card. 


Inside of the card. 


Video Short


Front of card. 


Inside of card. 


Video Short


Happy Stampin' Everyone!!!


Fun Fold Friday- Ornamental Christmas Z Fold Gift Card Holder


Fun Fold Friday + my Demo Swap! 
It has been a while since I've made a Fun Fold Friday and so I am excited to share with you today's creation! Also, I made this card for Demo Swap. Demo Swap usually comes with a challenge and rules to follow for the card. 
Here is what the card had to have:
💙Z Fold
💙Regals Color Family
💙Use a Die
💙Holiday 
💙Ribbon (I used Baker's Twine)


The front of the card using the tree from the Ornamental Christmas stamp set and I used the Textured Notes Dies to create that stitching border. 


The card opens up to a "Z" fold to reveal the Merry Christmas message and a pocket to hold a gift card in. 
Below is a list of supplies I used to make these card. Just click on the image and it will take you to my online store. 


Measurements
Cherry Cobbler: 4 1/4" x 5 1/2", 4 1/4" x 9" scored @ 3" & 6"
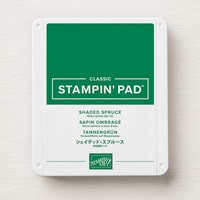
Shaded Spruce: 2 1/2" x 4"
Basic White: (2) 2 3/4" x 4"
DSP: 4" x 5 1/4", 2 7/8" x 3

Steps
  1. Measure, score, and cut your paper. 
  2. Die cut one of Basic White with the Textured Notes Dies (2 1/4" x 3 3/4).  Die cut the star from Gold Foil. 
  3. Stamp with Memento Black onto the die cut Basic White the tree. 
  4. Stamp the other Basic White with Shaded Spruce the "Merry Christmas". 
  5. Use a 2" punch on the DSP 2 7/8" x 3" to create a gift card notch on the top of the 2 7/8" side. 
  6. Assemble: Glue the DSP to the Cherry Cobbler. Z Fold: Front- Glue the die cut Basic White to the Shaded Spruce matte. Use Dimensionals to attach to the front of the "Z" (score is on the right side). Middle- Use tear tape along the sides of the DSP except at the top notch spot. Attach to the middle of the Z Fold. Inside- Glue the Basic White to the final panel. Attach the whole Z fold to the DSP on the 5 1/2" x 4 1/4" of Cherry Cobbler & DSP. 
  7. Embellish with a Baker's Twine bow and 3 of the Shades of Green Hexagons. 

Video


Happy Stampin' Everyone!!!

November Card Class Club- Christmas Crew

Card Class Club for November with Christmas Crew!!! Register by November 12th by clicking HERE Here is a SNEAK PEEK of close up of one of th...