t> The Joy of Stampin' with Rachael

Wednesday, August 21, 2024

New at SU Blog Hop- Emboss Dry, Emboss Heat Technique


Welcome to the NEW AT SU! Blog hop! We are a group of Stampin’ Up! Independent Demonstrators from around the world who are full of creative paper crafting ideas to share with you and get you crafting! Today we are sharing ways you can use Stampin' UP!'s Embossing Folders to Elevate your creations.


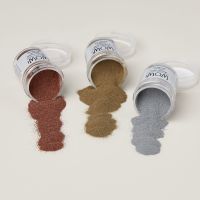
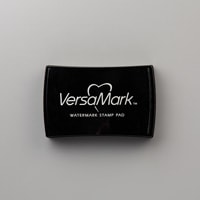
I chose the Metal Plate 3D Embossing Folder to Dry Emboss and Versamark to Heat Emboss with silver powder! 
*Dry emboss uses cardstock/paper with the Stampin' Cut & Emboss Machine to change the texture of the paper. It leaves a dry impression from the embossing folder.
**Heat embossing requires Versamark (Clear Ink), Embossing Powder, and a Heat Tool. 


For this technique the Embossing Folder can act like the stamp or you can create your own Foil Paper. 


Technique Steps
1. Open up the embossing folder and put Versamark (Clear Ink) all over the top part of the embossing folder (the side that has the little black Stampin' UP! logo). 
2. Put the paper down on the dry side and close the inked folder onto the paper (you could just do a light press and create a stamped look if you wanted at this point).
3. Run it through your Stampin' Cut & Emboss Machine.
4. Sprinkle on the Embossing Powder and shake off the extra (I used Silver). 
5. Use the Heat Tool to melt the powder. 
You now have a piece of cardstock that looks like Silver Foil Paper and is embossed! 


Since I paired this embossing folder with the Trusty Tools, I wanted a rustic look and some spots did not get heat embossed. If you want the full piece of paper covered you need to measure it slightly larger to allow for some "holding" space and then trim it down to size. 


I just love the look and result this technique created for this card! 

Don't stop here! Keep the hop going to learn even more fun ways to use Stampin' UP! Embossing Folders!
*Click on next or select a link that interests you. 


I am happy to answer any questions about the techniques shown here! Please contact your Stampin’ Up! demonstrator to make a product purchase. If you do not have a demonstrator, you can use the links below to order products from me or join my team.


Sale ends August 31st! 
*Click on image to see the sale!

Happy Stampin' Everyone!!!


Tuesday, August 20, 2024

Tuesday's Tip at Ten- My Small Business


Tuesday's Tip at Ten! 
Do you own a small business or work in customer care (including teachers)?? 
If YES, you should add this amazing stamp set to your list, 
My Small Business. 

We can never say thanks enough but this one has EXTRA phrases perfect for YOUR small business! 
I can't wait to start stamping with it! 


Happy Stampin' Everyone!!!


Monday, August 19, 2024

Manly Monday- Bistro Burger


Manly Monday with the Bistro Burger Bundle design by the Stamp & Share Crew Design Team! 


The Bistro Burger Bundle is a great set to have to create delicious cards and is easy to make a little more masculine card with this set! 


Here is your FREE Tutorial on how to make the card above! Shop with me and earn my August Rewards! 


August 2024 Rewards
Use Host Code B7R7VHS4 and as a thank you for ordering

💚 Spend $15 and get the July Layout Love pdf 
💚 Spend at least $50 and get my Happy Mail Gift & Card 
💚Spend $150 or more and receive Stampin’ Rewards


Bistro Burger

All images © 1990-2024 Stampin’ Up!®


Supplies:


·       Stamp Sets: Bistro Burger Bundle (163650); Sketched Plaid (161424)

·       Cardstock (CS) and Paper: Basic White Thick (159229); Basic Black (121045); Real Red (102482)

·       Stamp Pads: Crushed Curry (147087); Old Olive (147090); Basic Gray (149165)

·        Tools: Stampin’ Cut & Emboss Machine (149653); Bistro Burger Bundle (163650) Paper Trimmer (152392); Stylish Shapes Dies (159183); Paper Snips (103579)

·       Miscellaneous: Iridescent Pearls (158987); Cherry Cobbler Stampin’ Blends (154880); Black & Very Vanilla 3/8” Large Check Ribbon (161982); Stampin’ Dimensionals (104430); Stampin’ Seal Adhesive (152813)


Measurements:


·       Basic White Thick – 4 ¼” x 11” scored at 5 ½”; 3 ½” x 4 ¾”; 3” x 3” and scrap

·       Real Red – 3 ¾” x 5”

·       Basic Black – 3 7/8” x 5 1/8”


Instructions:


1.     Stamp the Sketched Plaid onto the 3 ½” x 4 ¾” piece of Basic White Thick cardstock.  Tie Black & Very Vanilla Check Ribbon into a bow around it and attach to Real Red cardstock with Stampin’ Seal Adhesive.

2.     Attach Real Red to Basic Black layer and then to card base with Stampin’ Seal Adhesive.

3.     Cut second to largest circle from Basic White Thick cardstock using the Stylish Shapes Dies.  Stamp pickles onto it using Old Olive ink. Attach to card base with Stampin’ Dimensionals.

4.     Stamp another pickle onto scrap Basic White Thick cardstock and die cut out.  Stamp sentiment in Basic Gray ink and fussy cut with Paper Snips and attach to card with Stampin’ Dimensionals.

5.     Color Iridescent Pearls with Dark Cherry Cobbler Stampin’ Blend and attach to card base.


Happy Stampin' Everyone!!!


October Card Class Club- Rejoice Christmas Cards

  Here are my Card Class Cards for the month of October using the Rejoice Stamp set to make religious Christmas Cards!  My Kit Class is no l...