

It is Wonderful Wednesday and the last one for June! If you order today, I will send you the Pebbles Enamel Shapes to help your Wednesday a little more Wonderful!!! Just order with the Hostess Code
ETDCBADQ

Today's Wonderful Wednesday creation comes from the Paper Pumpkin Pick of the Crop kit stamp set! I always like to find ways to use the stamp set once all of the supplies from the kit is gone. If you would like to see what came in the original kit, click here to visit that blog post.

I found a fun way to make these strawberries with just a little extra fussy cutting.

For the inside of the card I used the masking technique and my Stampin' Blends to come them in.
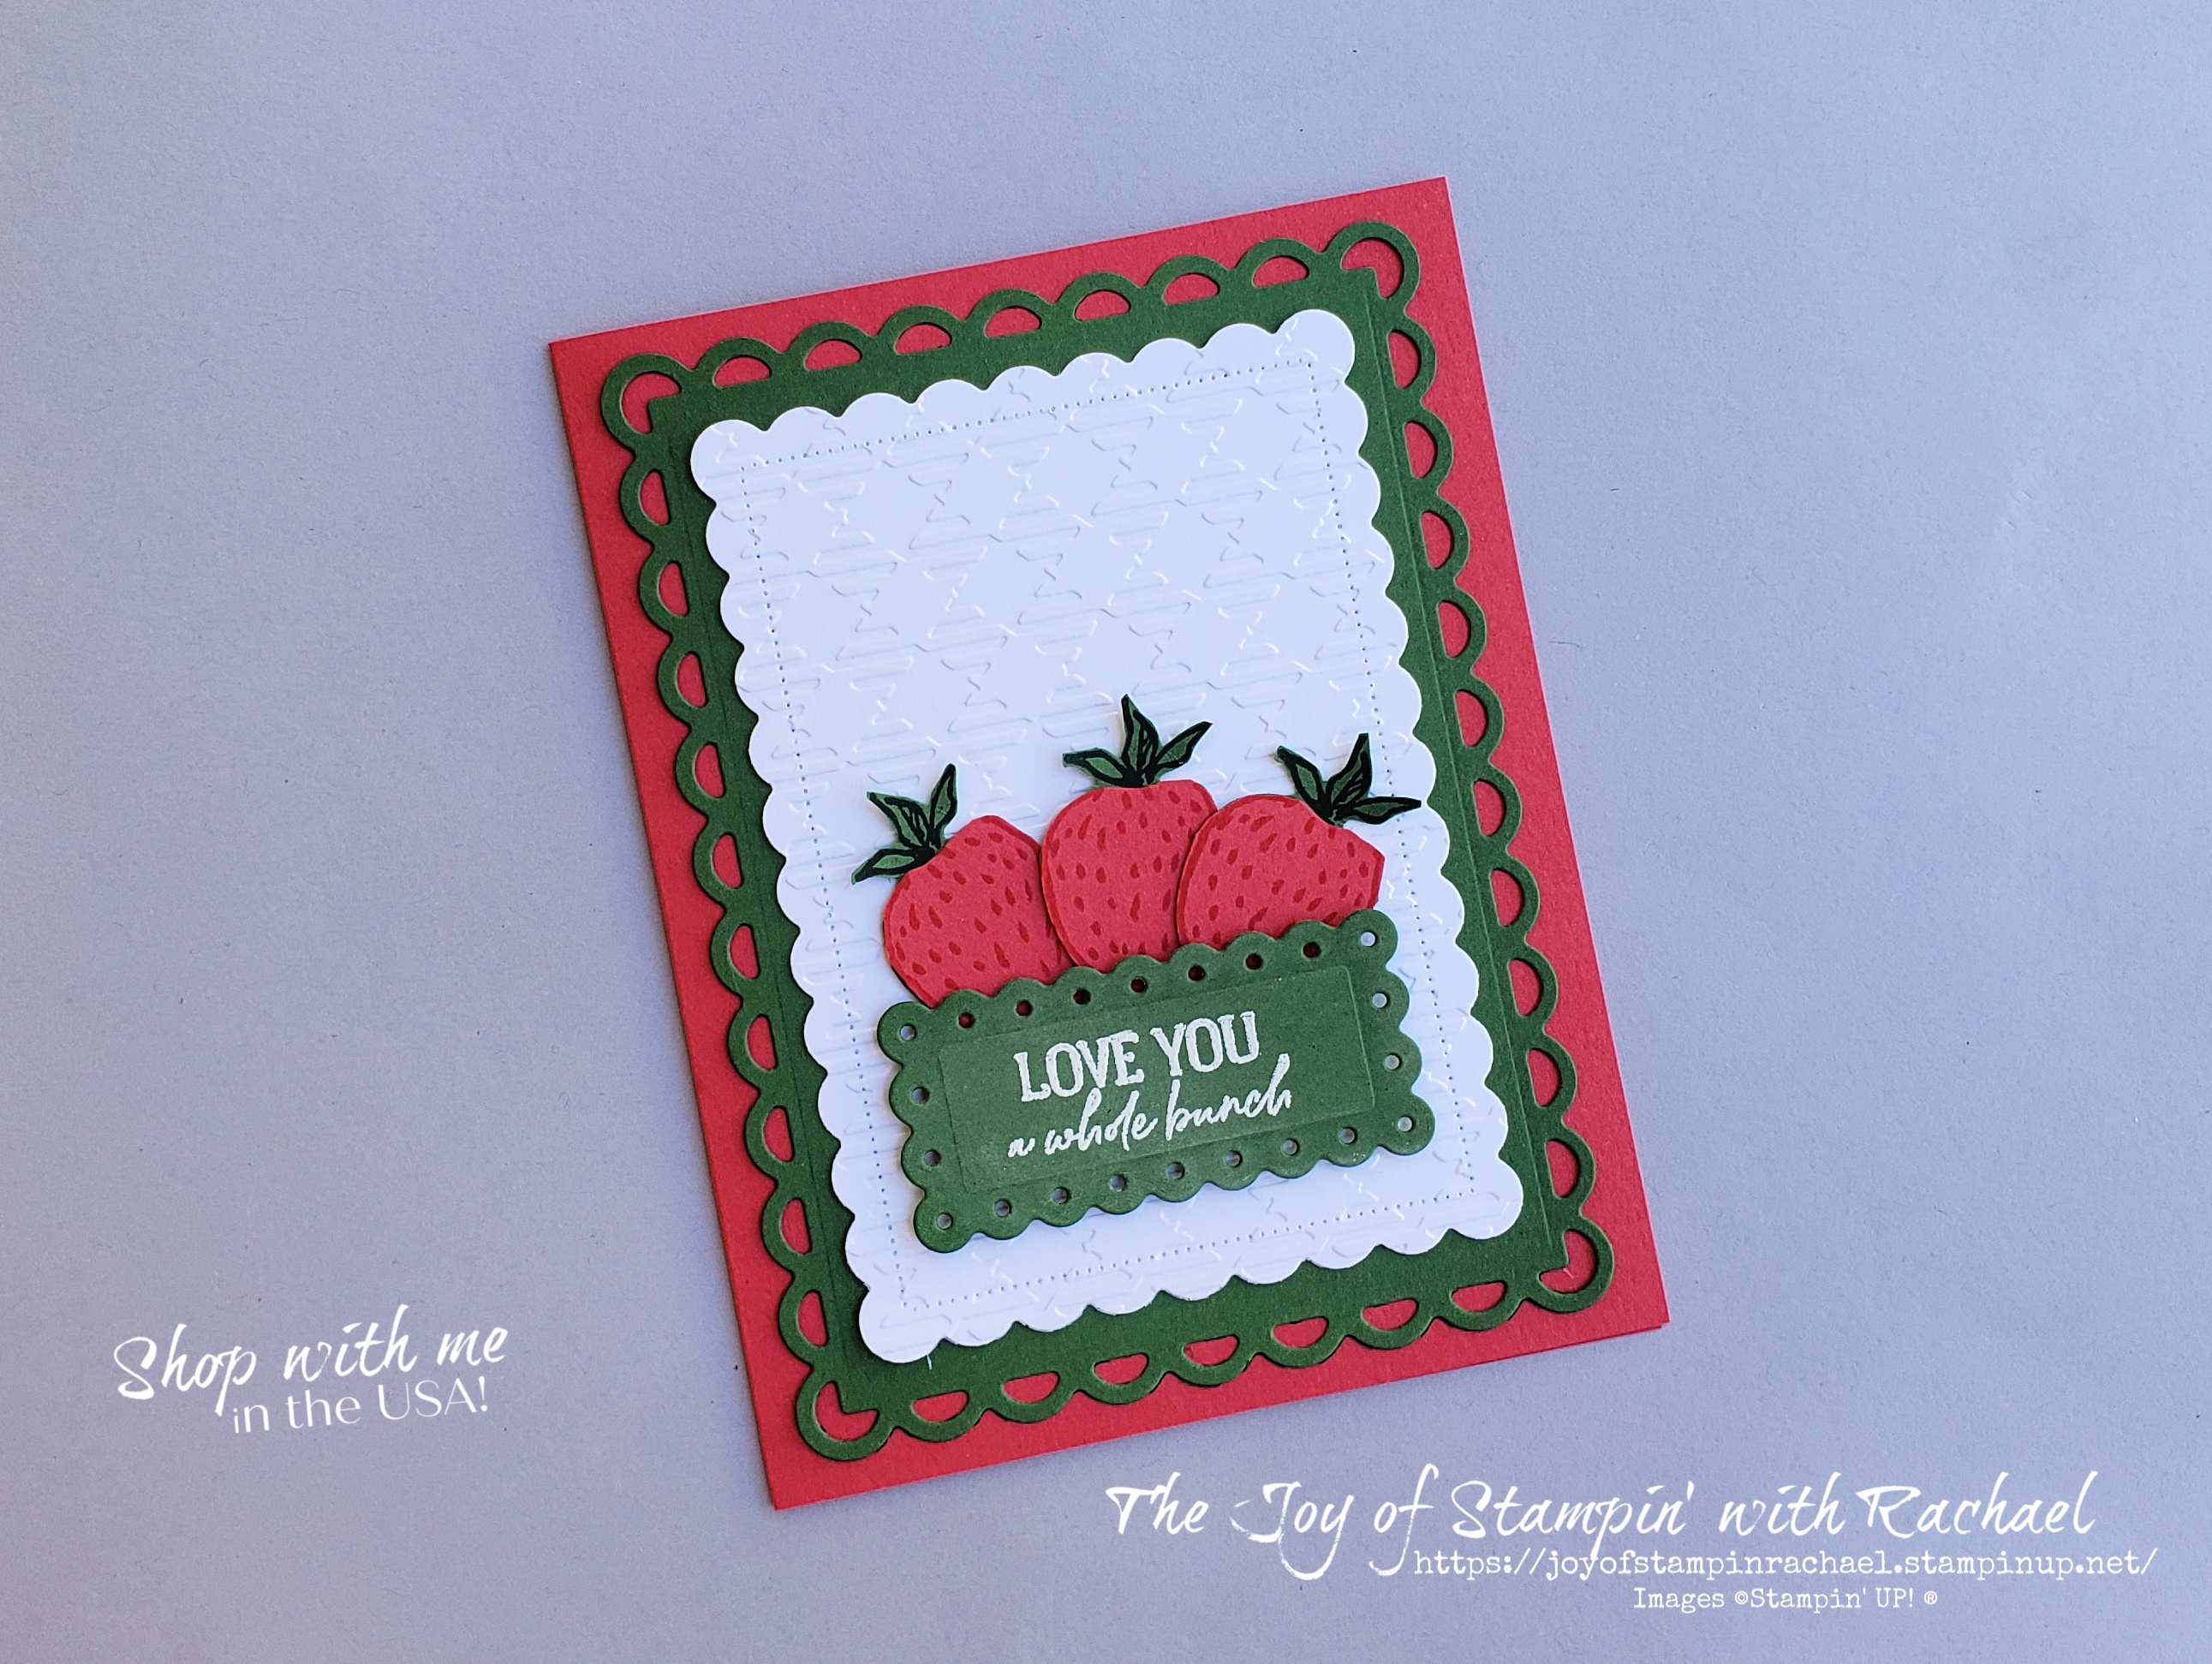
I used the Scalloped Contour Dies to create this layer look and the Gingham embossing folder for some added texture.

To make the strawberry with 2 colors is quite easy with just a little help of your Paper Snips. Just like a strawberry starts out green/white, so does the base of our strawberry. Then stamped in the Sweet Sorbet is the strawberry center with the stems cut off. Glue them together and you have a pretty sweet two toned strawberry!
Supplies
Pick of the Crop Stamp Set
Scalloped Contour Dies
Stampin' Cut & Emboss Machine
White Embossing Powder
Heat Tool
Paper- Garden Green, Sweet Sorbet, Basic White
Ink- Veramark, Memento Ink, Sweet Sorbet, Evening Evergreen
Stampin' Blends- Sweet Sorbet, Soft Succulent or Granny Apple Green
Dimensionals
Measurements
Sweet Sorbet Cardbase: 5 1/2 x 8 1/2 scored @ 4 1/4
Garden Green: 5 1/2 x 4 1/4
Basic White: 4 x 5 1/4
5 1/2 x 4 1/4
Scraps of Garden Green and Sweet Sorbet for strawberries
Steps
- Measure, score and cut your paper.
- Die cut your Scalloped Contour layers. Die cut from the center of the Garden Green the smallest scallop rectangle.
- Heat emboss with white onto the smallest scallop rectangle your favorite saying that fits. I used the "Love You a whole bunch".
- Stamp in Evening Evergreen onto the Garden Green scrap and stamp in Sweet Sorbet onto the Sweet Sorbet the strawberry. Fuss cut them both out but remove the stems from the Sweet Sorbet. Do this 3 times.
- Emboss with the Gingham Folder onto the Basic White.
- Glue your layers to the cardbase front. Use dimensionals to attach the label and then add the strawberries to be slightly behind the label.
- For the inside, stamp one strawberry onto a post it note or masking tape and fussy cut it out. Stamp in Memento Ink one strawberry into the corner of the Scallop Rectangle. Cover it with the mask and stamp next it to make the strawberries look like they are over lapping. Color the strawberries with your Stampin' Blends and glue the scalloped rectangle into your card.
Facebook Live Video
Happy Stampin' Everyone!!!


No comments:
Post a Comment
Thank you so much for leaving me a comment! It really makes my day and I love hearing from you! <3