By voter's choice, Fun Fold Friday uses the Winterly Tree Tops Suite available NOW in Starter Kits or available on September 4th to ALL Stampin' Friends!
This Double Stack Fun Fold was inspired by Mary Deatherage!
Here is the Winterly Tree Tops Bundle (stamp set and die), but my card features all of items from the Nest of Winter Suite.
Nests of Winter Designer Series Paper (DSP)
Natural Tones Linen Thread
Earth Tones Shimmer Gems
Birch Wood 3D Embossing Folder
This Fun Folds opens all the way up to show an inside message.
I used the DSP to die cut the birds, which were perfectly colored. Add this Suite to your September list or get it NOW as a Demonstrator or add it to your Starter Kit.
August 2024 Rewards
Use Host Code B7R7VHS4 and as a thank you for ordering
💚 Spend $15 and get the July Layout Love pdf
💚 Spend at least $50 and get my Happy Mail Gift & Card
💚Spend $150 or more and receive Stampin’ Rewards
Supplies
Product List
Measurements
Basic Gray: 4 1/4" x 5 1/2", 4 1/4" x 11" scored @ 2", 3 3/4", 7 1/4, & 9
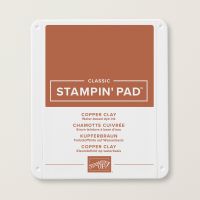
Copper Clay: (2) 3 1/2" x 3 3/4", 3 1/4" x 3 1/2"
Basic Beige: 4" x 3 1/4"
DSP: 3 1/4" x 3 1/2"
3/4" x 4"
Steps
- Measure, score, and cut your paper.
- Die cut the birds from the DSP or stamp, color and die cut the birds.
- Emboss the 3 1/4" x 3 1/2" Copper Clay.
- Stamp onto the Basic Beige the greeting and branch in Copper Clay. Use a white colored pencil to color in the buds. Glue to the inside of the Basic Gray middle (between 3 3/4" & 7 1/4"). Glue the stripes of DSP to the edges of the 4 1/4" x 5 1/2" Basic Gray.
- Glue the DSP to the Copper Clay matte and attach half of it to right inside. Make sure the Copper Clay piece doesn't go over in the inside score line. (See video)
- Glue the embossed Copper Clay to the matte. Make a 3 loop nest using your fingers (see video) and place on the back of the DSP. Secure the nest with dimenionals. Then place on the embossed Copper Clay. Use 3 of the Clopper Clay gems to embellish. Glue the Copper Clay to the left side of the scored Basic Gray.
Video
If you enjoyed this post…
👉Subscribe to my YouTube Channel to watch my tutorials
👉 Subscribe to my Email List to receive Weekly Deal Updates & Creations
👉 Follow me on my Facebook page to connect and share
👉Get the Starter Kit for $99 and get FREE Shipping + Supplies + $124 product choice
Happy Stampin' Everyone!!!


No comments:
Post a Comment
Thank you so much for leaving me a comment! It really makes my day and I love hearing from you! <3