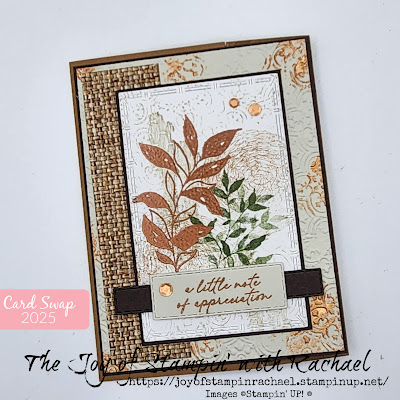
Sometimes you just need to send a card that says hello.
Here are two card ideas from the Stamp & Share Crew Design Team on how to make and send a simple hello!

Flowers of Beauty
All
images © 1990-2025 Stampin’ Up!®
Supplies:
·
Stamp Sets: Flowers of Beauty (163374);
Everyday Greetings (165084)
·
Card Stock and Paper: Berry Burst (144243); Basic
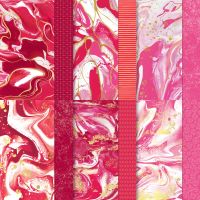
White (159276); Silver Foil Beautiful Bokeh DSP (164607)
·
Stamp Pads: Berry Burst (147143);
Granny Apple Green (147095)
·
Tools: Happy Hibiscus Hybrid Embossing Folder/Dies (164879);
Stylish Shapes (159183; Irresistible Blooms Dies (161149); Blending Brushes
(153611)
·
Miscellaneous: Rhinestone Basic Jewels (144220);
Iridescent Striped Trim 1/2" (1.3 CM) (163299); Stampin’ Seal Adhesive
(152813); Stampin’ Dimensionals (104430); Multipurpose Liquid Glue (110755); Take
Your Pick Tool (144107); Paper Snips (103579); Stampin’ Cut & Emboss
Machine (149653)
Measurements:
·
Card Stock 1: 5 ½” x 8 1/2”, score at 4 ¼” on long side and fold
for card base,
·
Card Stock 2: 4” x 5 ¼” (x2), scrap for stamping
·
Card Stock 3: 2 ¾” x 4 ¼”
·
DSP: ¾” x 4” (x3)
·
Ribbon:18”
Instructions:
1. Emboss one of the Basic White
panels with the Happy Hibiscus Hybrid Embossing
Folder, gently brush Berry Burst ink onto the embossed CS with a Blending Brush,
wrap with Iridescent Striped Ribbon and tie bow on the left side. Adhere to center of card front with Stampin’
Dimensionals.
2. Attach DSP strips to Basic
White CS with Stampin’ Seal and adhere near the right side with Stampin’ Seal.
3. Cut a Circle using Stylish
Shapes Dies.
4. Stamp circle with Berry
Burst ink and Hello Stamp. Using the Berry
Burst ink with small bloom stamp and die cut.
Stamp leaves with Granny Apple Green ink to the left, upper side of the
circle. Attach flower with Multipurpose Glue. Attach circle to card front with
Stampin’ Seal.
5. Add Rhinestone Basic Jewels
to embellish.
6. Decorate the inside of your
card and your envelope as desired.

Beautiful Butterflies
All
images © 1990-2025 Stampin’ Up! ®
Supplies:
·
Stamp Sets: Beautiful Butterflies Bundle (164615),
·
Card Stock and Paper: Basic Black (121045), Basic Beige (164511), Basic White (159276)
·
Stamp Pads: Memento Ink (132708)
· Tools: Beautiful Butterflies Hybrid Embossing
Folder (164614), Unbounded Love Dies (163383)
·
Miscellaneous: Neutral
Matte Dots (165561), Stampin’ Dimensionals
(104430), Stampin’ Seal Adhesive (152813)
Measurements:
·
Basic Black 8 ½ x 5 ½
·
Basic Beige 4 x 5 ¼
·
Basic White for diecutting/embossing
Instructions:
1. Embossing Basic Beige with
Butterfly Embossing Folder and layer on card base.
2. Add Basic White and
butterfly die inside embossing folder.
Run through machine and cut/emboss at the same time
3. Add butterfly to card front
using Dimensionals
4. Stamp sentiment in Memento
Ink on white circle and add using Dimensionals
5. Add gems as desired
Happy Stampin' Everyone!!!


![Beautiful Butterflies Bundle (English) [ 164615 ] Beautiful Butterflies Bundle (English) [ 164615 ]](https://assets1.tamsnetwork.com/images/EC042017NF/164615s.jpg)
![Stylish Shapes Dies [ 159183 ] Stylish Shapes Dies [ 159183 ]](https://assets1.tamsnetwork.com/images/EC042017NF/159183s.jpg)
![Nested Essentials Dies [ 161597 ] Nested Essentials Dies [ 161597 ]](https://assets1.tamsnetwork.com/images/EC042017NF/161597s.jpg)
![Sponge Daubers [ 133773 ] Sponge Daubers [ 133773 ]](https://assets1.tamsnetwork.com/images/EC042017NF/133773s.jpg)
![Basic White 8 1/2" X 11" Cardstock [ 166780 ] Basic White 8 1/2" X 11" Cardstock [ 166780 ]](https://assets1.tamsnetwork.com/images/EC042017NF/166780s.jpg)
![Basic White 8 1/2" X 11" Thick Cardstock [ 159229 ] Basic White 8 1/2" X 11" Thick Cardstock [ 159229 ]](https://assets1.tamsnetwork.com/images/EC042017NF/159229s.jpg)
![Balmy Blue 8-1/2" X 11" Cardstock [ 146982 ] Balmy Blue 8-1/2" X 11" Cardstock [ 146982 ]](https://assets1.tamsnetwork.com/images/EC042017NF/146982s.jpg)
![Fresh Freesia 8 1/2" X 11" Cardstock [ 155613 ] Fresh Freesia 8 1/2" X 11" Cardstock [ 155613 ]](https://assets1.tamsnetwork.com/images/EC042017NF/155613s.jpg)
![Beautiful Bokeh 6" X 6" (15.2 X 15.2 Cm) Designer Series Paper [ 164607 ] Beautiful Bokeh 6" X 6" (15.2 X 15.2 Cm) Designer Series Paper [ 164607 ]](https://assets1.tamsnetwork.com/images/EC042017NF/164607s.jpg)
![Balmy Blue Classic Stampin' Pad [ 147105 ] Balmy Blue Classic Stampin' Pad [ 147105 ]](https://assets1.tamsnetwork.com/images/EC042017NF/147105s.jpg)
![Balmy Blue Classic Stampin' Ink Refill [ 147168 ] Balmy Blue Classic Stampin' Ink Refill [ 147168 ]](https://assets1.tamsnetwork.com/images/EC042017NF/147168s.jpg)
![Calypso Coral Classic Stampin' Pad [ 147101 ] Calypso Coral Classic Stampin' Pad [ 147101 ]](https://assets1.tamsnetwork.com/images/EC042017NF/147101s.jpg)
![Fresh Freesia Classic Stampin' Pad [ 155611 ] Fresh Freesia Classic Stampin' Pad [ 155611 ]](https://assets1.tamsnetwork.com/images/EC042017NF/155611s.jpg)
![Berry Burst Classic Stampin' Pad [ 147143 ] Berry Burst Classic Stampin' Pad [ 147143 ]](https://assets1.tamsnetwork.com/images/EC042017NF/147143s.jpg)
![Stampin' Up! Masking Paper [ 155480 ] Stampin' Up! Masking Paper [ 155480 ]](https://assets1.tamsnetwork.com/images/EC042017NF/155480s.jpg)
![Itty Bitty Bokeh Mix [ 164618 ] Itty Bitty Bokeh Mix [ 164618 ]](https://assets1.tamsnetwork.com/images/EC042017NF/164618s.jpg)
![Stampin' Dimensionals [ 104430 ] Stampin' Dimensionals [ 104430 ]](https://assets1.tamsnetwork.com/images/EC042017NF/104430s.jpg)
![Blending Brushes [ 153611 ] Blending Brushes [ 153611 ]](https://assets1.tamsnetwork.com/images/EC042017NF/153611s.jpg)
![Stampin' Cut & Emboss Machine [ 149653 ] Stampin' Cut & Emboss Machine [ 149653 ]](https://assets1.tamsnetwork.com/images/EC042017NF/149653s.jpg)




.jpg)

