This Theatre Fold is AMAZING and can be a little tricky, but totally worth a try. That being said, I won't be making dozen of these at a time any time soon, but it does get easier each time I make it. So, make 2 instead of 1, to get your skills and confidence up there!!

When I saw this fold I knew I had to try it with the Whale Done stamp set and DSP. I love the idea of the ocean opening up like stage curtains to see the real show that lies beneath the waters.
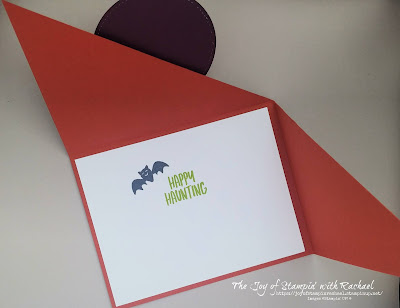
Here is a top view to help you see some of the moving parts. But please, watch my video to truly see this card in action!
You can make this card too by ordering from my online store the supplies and following the directions below!
Supplies
Whale Done stamp set
Whale Builder Punch
Whale of a Time DSP
Pacific Point CS & Ink
Whisper White CS
Whale of a Time Sequins
Vellum
Smooth Sailing Dies
Stitched Rectangle Dies
1 inch punch
Always Recommended
Paper Snips
Trimmer
Simply Shammy
Die Cutting Machine
Bone Folder
Adhesives
Measurements
Pacific Point: Front and Back~ 2- 4 1/4 x 5 1/2
Moving Doors~2- 4 1/8 x 5 3/8 scored @ 1 1/16 & 2 5/8
Strips for Front piece~2- 3/4 x 6 1/4 scored @ 1 & 5 1/4
Center Tab-~1 1/4 x 4 1/4
DSP: 4 x 5
3 1/8 x 4 1/8
Steps
- Measure and cut all your cardstock and your DSP.
- Stamp the whale of a scrap of Whisper White in Pacific Point and punch him out with the Whale Builder Punch.
- Stamp on your 3 1/8 x 4 1/8 DSP the Whale Done saying. Don't stamp it at the top but a just a little above the middle (so it can be seen through the stage doors).
- Front Frame: Run one of your 4 1/4 x 5 1/2 cardstock with your 4 x 5 DSP through your Stampin' Cut and Emboss machine with the stitched rectangle die to make a frame. Glue together. Cut the DSP rectangle in half at 2 inches and set aside.
- Measure the front frame at 2 1/8 on the 4 1/4 end on each side and mark with a pencil. Use the circle punch to punch out just a tab. Do not punch into the DSP.
- Attach with liquid Tombow glue to the back of the front frame the stripes for the front piece. One on the back of each side.(see video)
- Moving Doors: You are going to make 2 slits. On the bottom measure 1/2 inch away from the 1 1/16 score line (towards the center). Move your trimmer blade 1/2 inch up (using your ruler on your trimmer where it cuts). Cut 1 inch up. Repeat for the other door.
- Fold the doors so they mirror each other . S shape on the left and a Z on the right. Glue down just the end with the 1 1/16 score line to the center of the 4 1/4 x 5 1/2 of cardstock . Glue down both doors at the same time to help you line it up right.
- Open the doors and glue on your 3 1/8 x 4 1/8 DSP.
- Center Tab: Take your 1 1/4 x 4 1/4 piece of cardstock and make it look like the letter "I". See the image below to help you see it better. First (yellow arrow), measure 1/2 away from the bottom/top of the ends. I mark it with my pencil. Then at that mark cut about 1/4 of an inch towards the middle (black arrow). Cut that at each end of the paper, so you'll have 4 cuts. Then cut between the snip marks and remove that piece (green arrow). Do this on both sides. You should have what looks like an "I" left.
- Fold in the tabs on both ends and pull through the slit on both of the moving doors. Then open up the tabs again and this will hold them in place.
- Attach your whale with a dimensional and your seaweed die cuts from vellum using the Smooth Sailing dies (use a glue dot to attach). Make sure your whale can fit inside while it is closed (see video).
- Embellish with the Whale of a Time sequins!
Video
Happy Stampin' Everyone!!!


.jpg)


